That One Thing to Fix All Your Repeater & Pagination Problems
You know that the pagination controls the data display on the repeater. But they don’t directly connect to each other. That’s why you see strange pagination behaviors when you change the data on the repeater. If you are facing the same problem, this article will help you clear the confusion and solve the problem nicely and simply.
Repeater and Pagination Integration
Before you start using repeater and pagination, it is crucial that you have the big picture of how they work. This section consists of mainly theory and some nice hand-draw pictures. But no worry. I will keep it short and sweet. So stay with me.
First, let me go over Wix repeater. The way it works is very straightforward. Your repeater connects to a dataset. The dataset connects to your collection. Therefore, the data flows from your collection to the dataset, then to your repeater. Any change in the dataset affects the data display on the repeater. See the picture below.
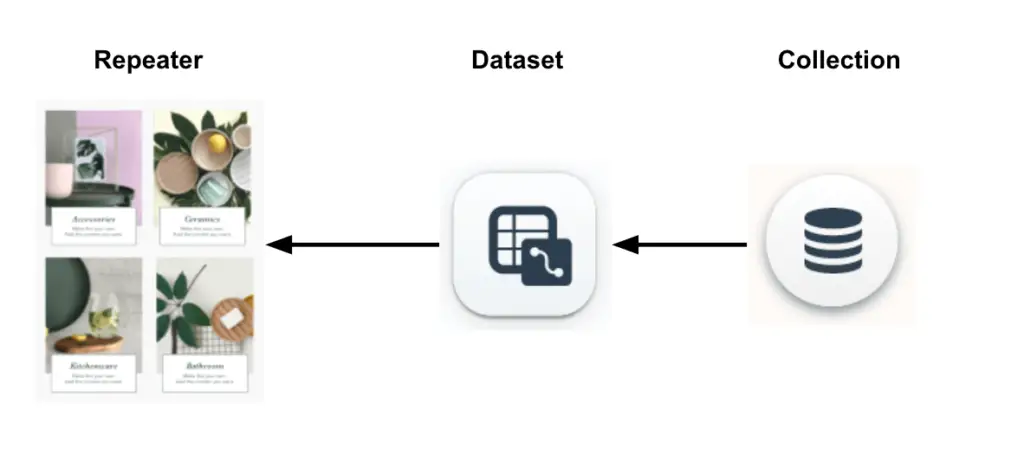 How Wix repeater works
Now let me add the pagination into the picture. You don’t link your pagination to the repeater. You link your pagination to the dataset. When you hit that “Next” button, your dataset changes. Then your repeater changes as a result.
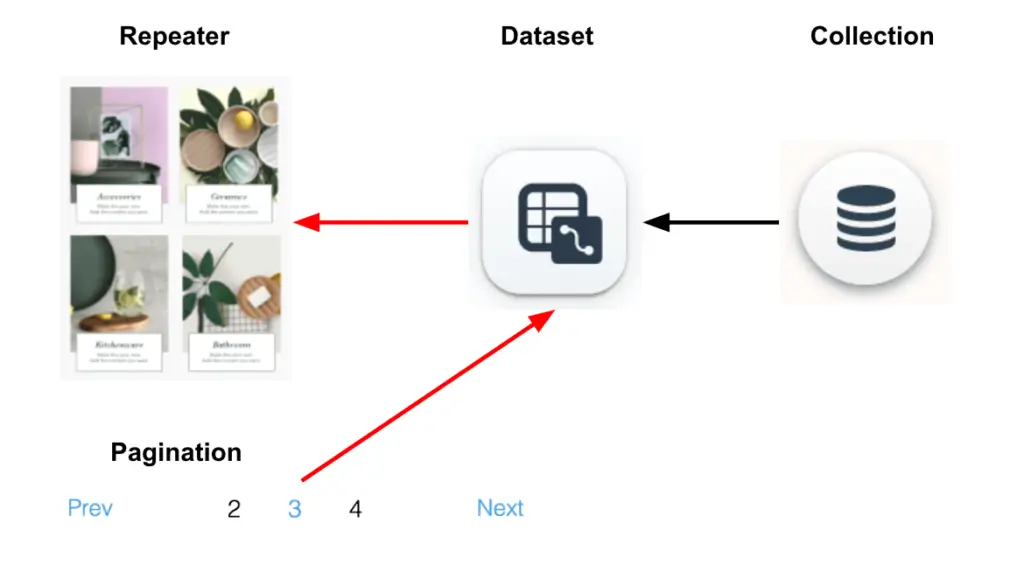 Wix repeater with pagination
Once you add the pagination, the whole process works as follow. The data first flows from your collection to your dataset. Then the pagination tells the dataset which data to display. The dataset then passes that data to the repeater to display.
The whole process is a one way street. If you use Wix codes to force the repeater to change, the repeater doesn’t communicate the change back to the dataset. The next action from the dataset will overwrite your change on the repeater. This leads to very strange results.
Therefore, your dataset must be the first thing you hammer before you touch your repeater.
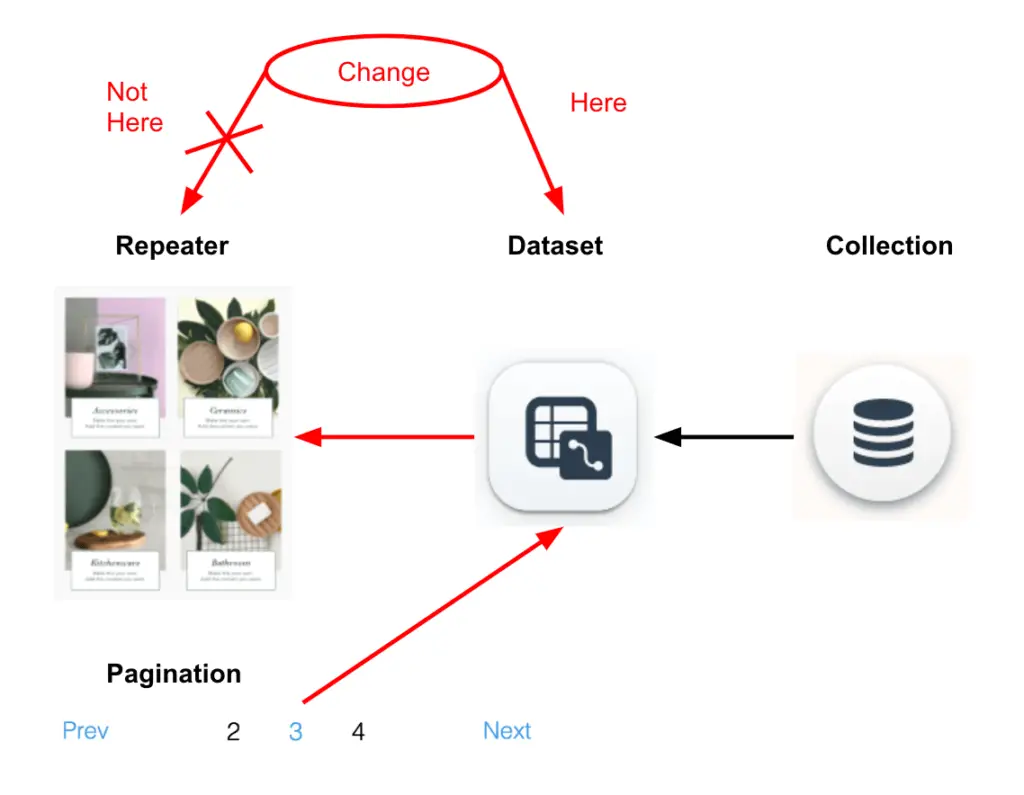 Where to change repeater
Filter Repeater Data
You get sufficient theory in the above section. In this section, I will show you how to change the repeater data without those funky consequences caused by the pagination. I am going to use the data filter example to demonstrate this.
Basically I have a collection of a team members. Each team member has a name, a job title, and an introduction. First, I have a filter for name. It searches my entire collection and selects only those with the name on the filter. Then, I add a second filter. The second filter looks at the result from the first filter, and selects only those with a specific job title.
After the exercise, you learn how to manipulate the repeater by manipulating the dataset instead. This approach is fairly simple and elegant. Because you only touch the dataset instead of both the repeater and the pagination. Therefore, you need very few lines of codes.
Set Up Repeater
Before you add a repeater to your site, you must create a collection. In this example, I am going to use a “Preset” collection for the quick and easy reason. “Preset” means that the collection is provided by Wix and ready to use. Don’t hesitate to experiment with your own collection. The principle remains the same.
You must switch on Dev Mode. Click on “Content Manager” icon. Select “Content Manager” on the menu. Then, create new collection. Select the “Use a Preset” option. Finally, open “Team” preset and “Add to Site”.
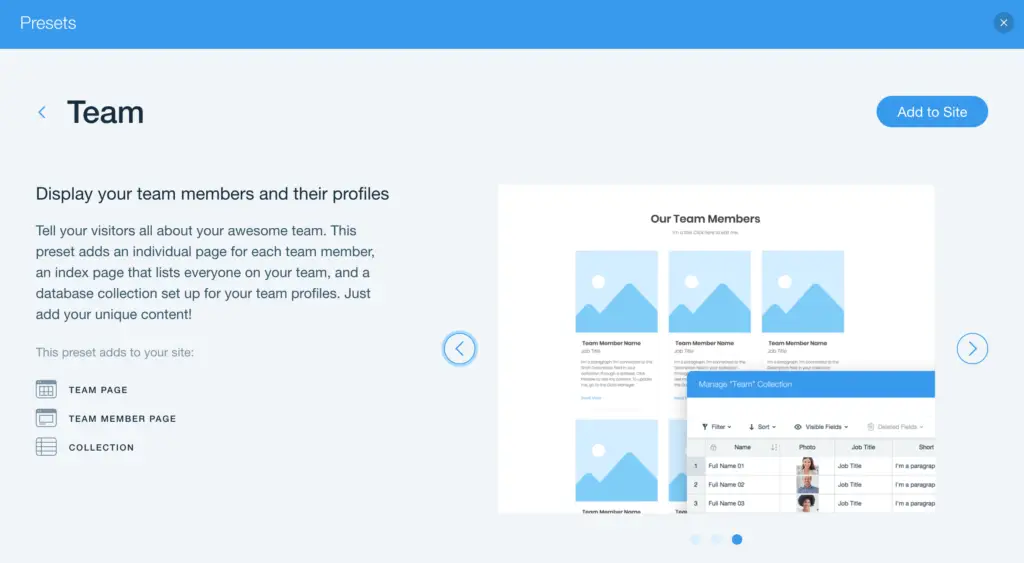 Use Team Preset for Creating Collection
Next, you create a new page and name it as “Repeater”. It should be a blank page on your site. When the page is ready, you can hit the “Add” icon, select “Lists & Grids” item, and add the “team member” repeater to your page.
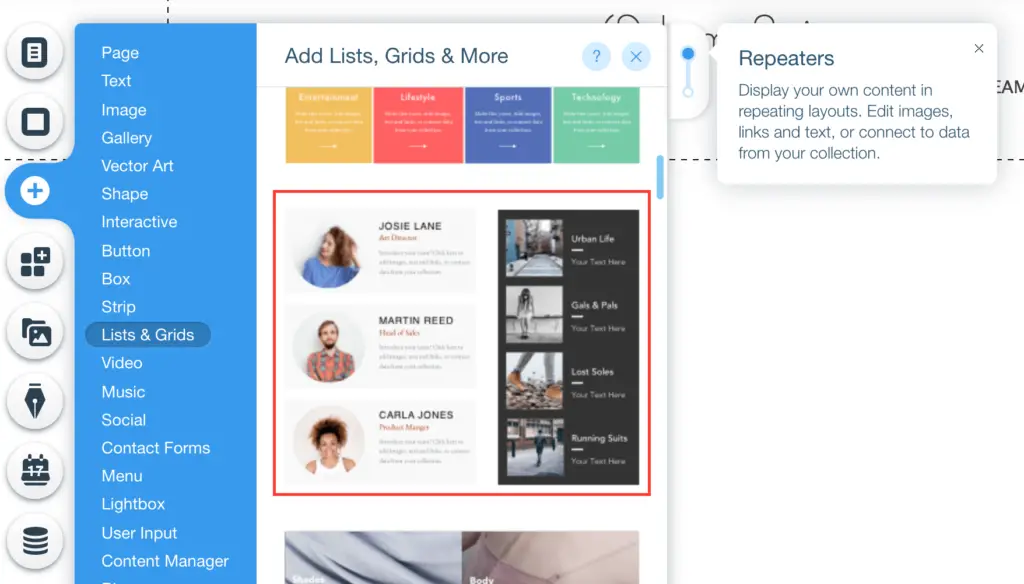 Add team member repeater
The repeater already have a few team members in it. But they are not from any collection. You don’t want them. Let’s delete them so that the repeater looks clean. To do so, you click “Manage Items” button, select each item, and delete. Keep doing it until you only have one item left.
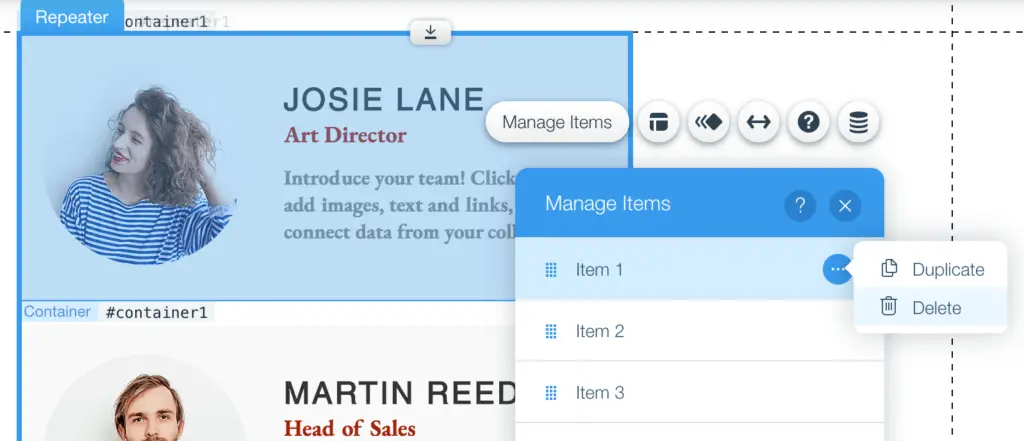 Delete Repeater Items
The repeater is now ready. Let’s connect it to your collection. Click the “Connect to Data” icon. Create Dataset. Choose “Team” Collection. Hit “Create” button.
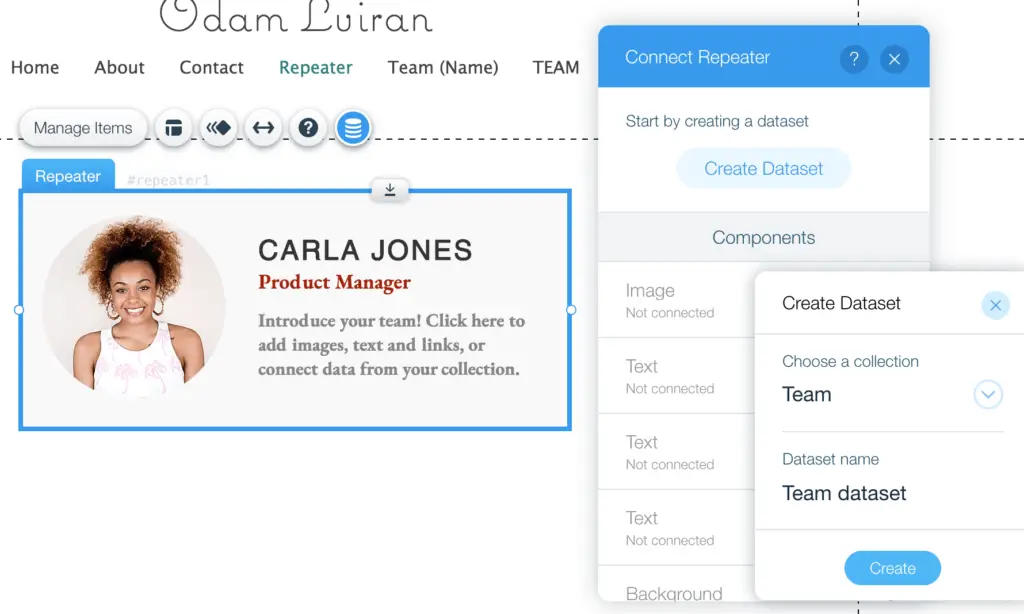 Create dataset for a repeater
The next step is to assign each component of the repeater to a field in “Team” collection.
- The image source of the image component connects to “Photo” field.
- The text of the introduction text component connects to “Long Description” field.
- The text of the job title component connects to “Job Title” field.
- The text of the name component connects to “Name” field.
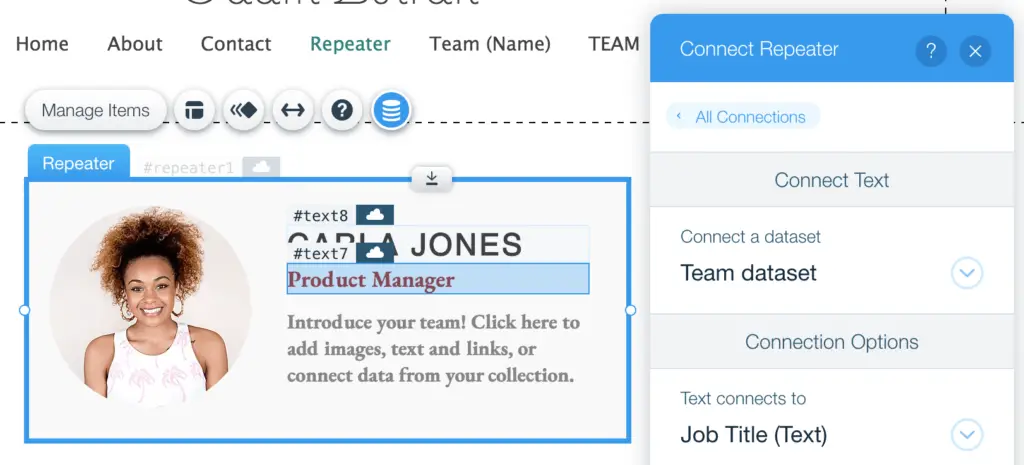 Connect job title component to job title field
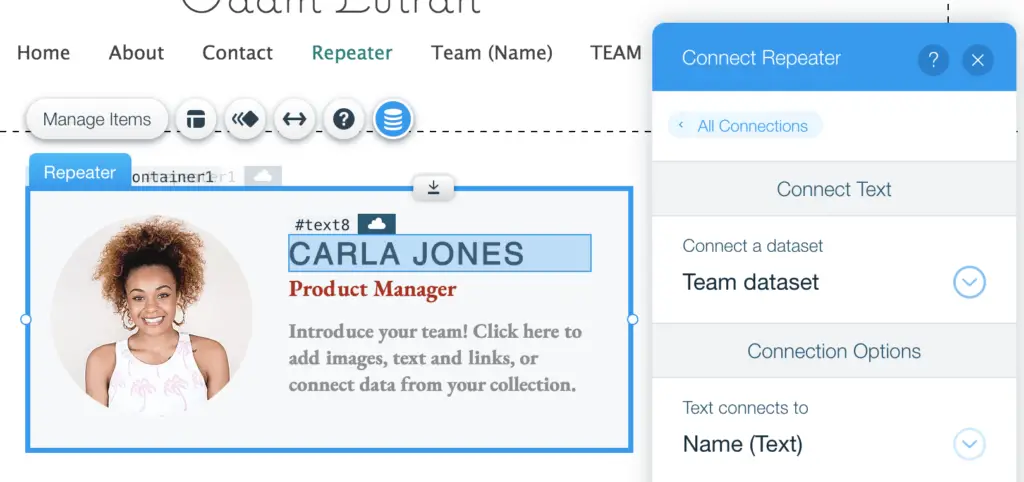 Connect name component to name field
That’s it for setting up the repeater. If you preview your page, you will see all six members in the “Team” collection.
Set Up Pagination
Perhaps displaying all six members on one page is too much. Your page looks cleaner if you display only one member per page. The visitors can hit “Next” or “Prev” buttons to see other team members. Those buttons are the pagination. Let’s add the pagination to your site.
You click “Add” icon. Select “User Input”. Then select “Pagination Bar”. Add any pagination to your page.
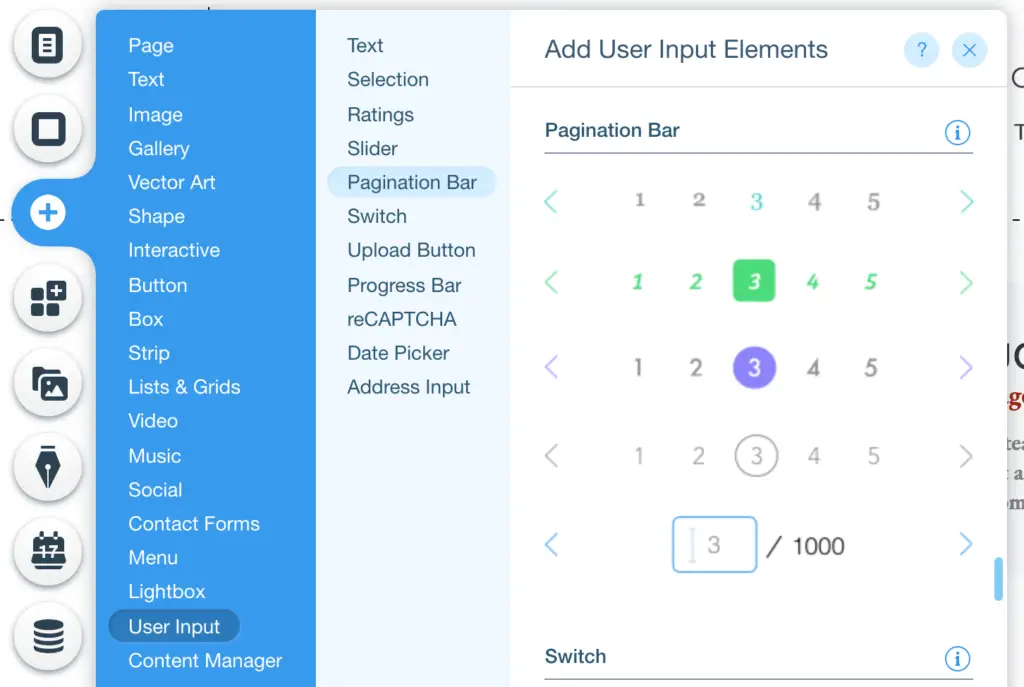 Add pagination bar
Remember the design chart above? The pagination connects to the dataset of the repeater. Not the repeater. That is why Wix asks you for the dataset when you hit that “Connect to Data” icon of the pagination. You choose “Team” dataset.
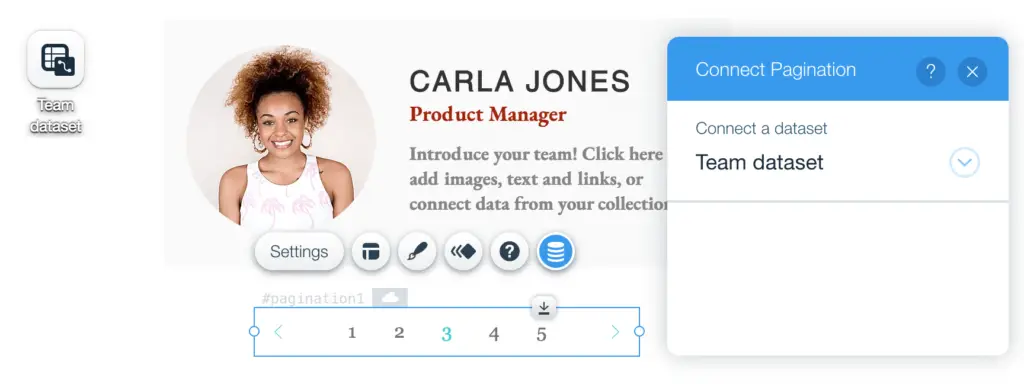 Link pagination to dataset
And the dataset controls the repeater. Therefore, you go to the dataset “Settings” and adjust the “Number of items to display” to “1”. This is the number of items to be displayed by the repeater on one page.
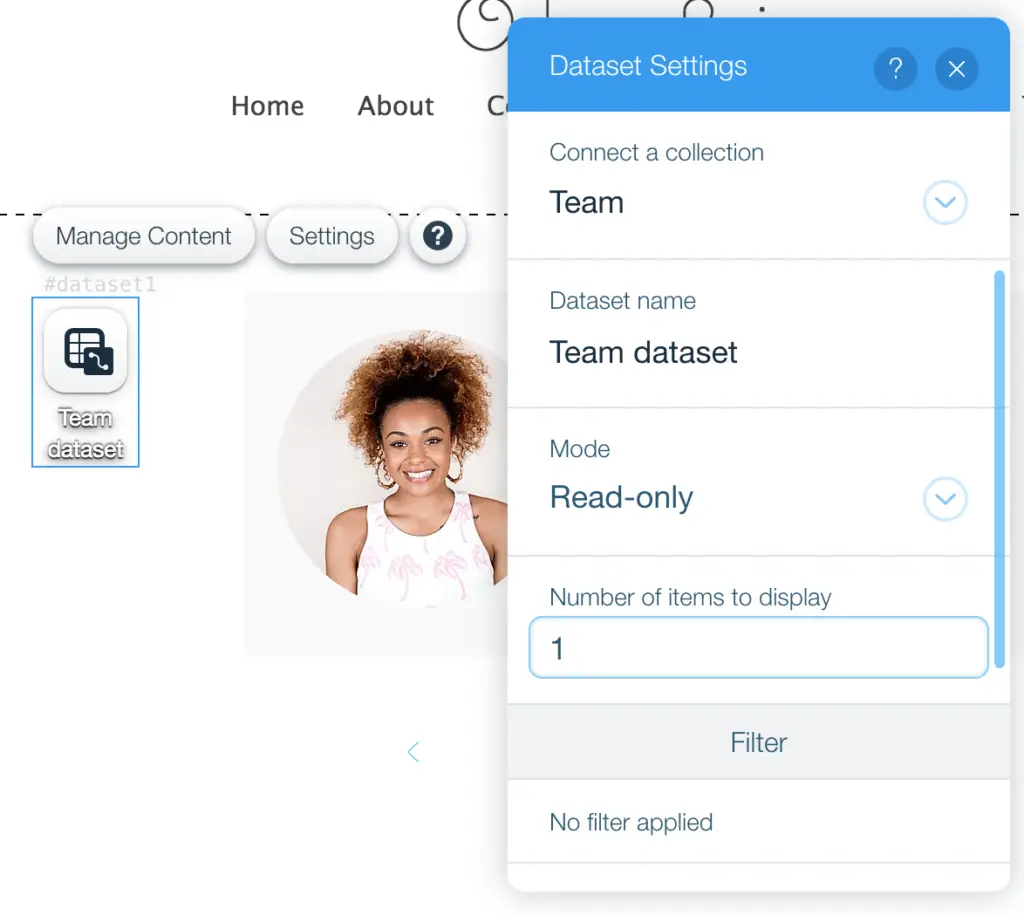 Number of items per repeater page
You complete the most basic steps to set up the pagination and the repeater. If you don’t have other requirement, I can leave now and have a wine. Just kidding. I have more to show. In the sections below I show you how to manipulate the data on the repeater without breaking this setup.
Filter Repeater For Name
In this section, you will use Wix codes to manipulate the dataset. You need to know the ID of the dataset so that Wix knows which dataset you refer to. You can find the ID in the “Properties” of the dataset. The ID is dataset1. But you should rename it as “datasetTeam” so that it is easy to understand.
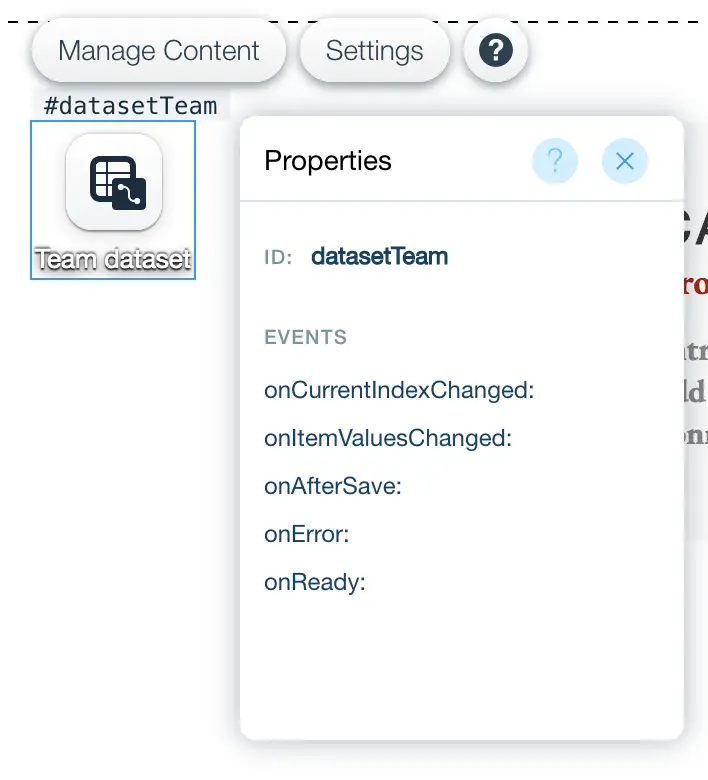 Rename dataset ID
Then you need a text input box so that the users can enter the name they are looking for. Click “Add” icon. Select “User Input”. Select “Text”. Add “Name” input.
 Add name filter
You right click on the name input. Select “Properties”. Change the ID to “filterName”.
 Rename name filter ID
You also need a button so that the filter starts when someone hits on it. Again click “Add” icon. Select “Button”. Select “Text Buttons”. Add a button to your page.
 Add filter button
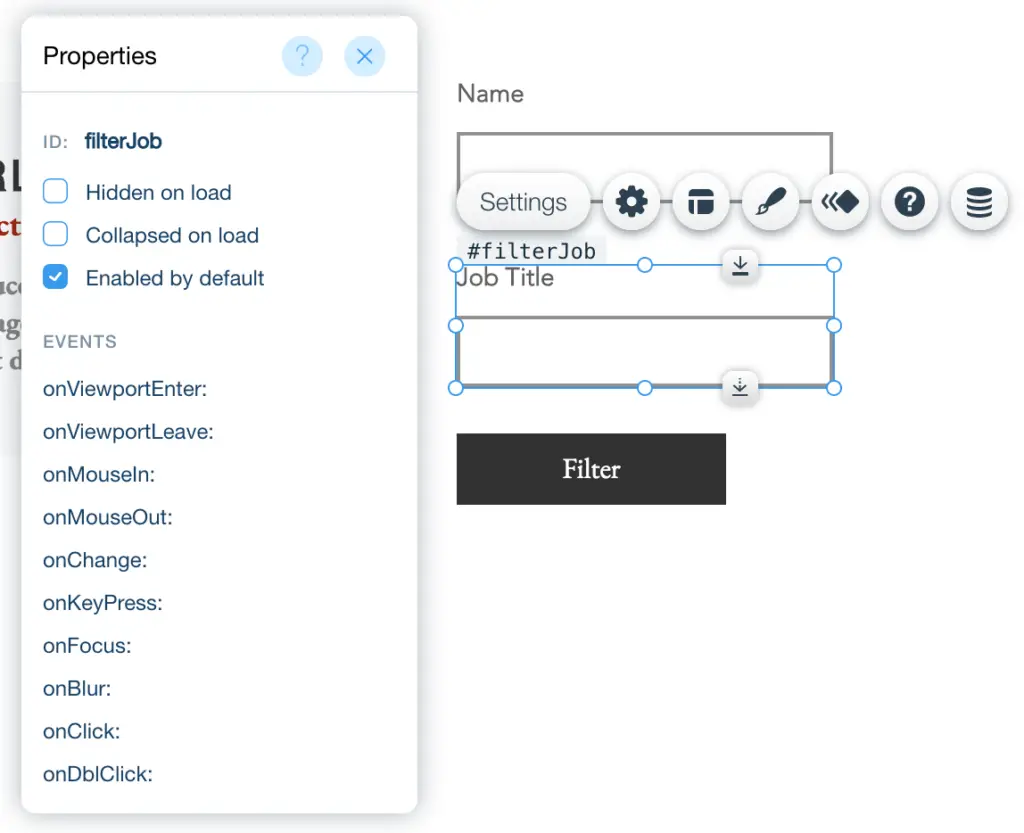
You rename the button as “Filter”. Set the ID property to be “filterButton”. And add onClick event.
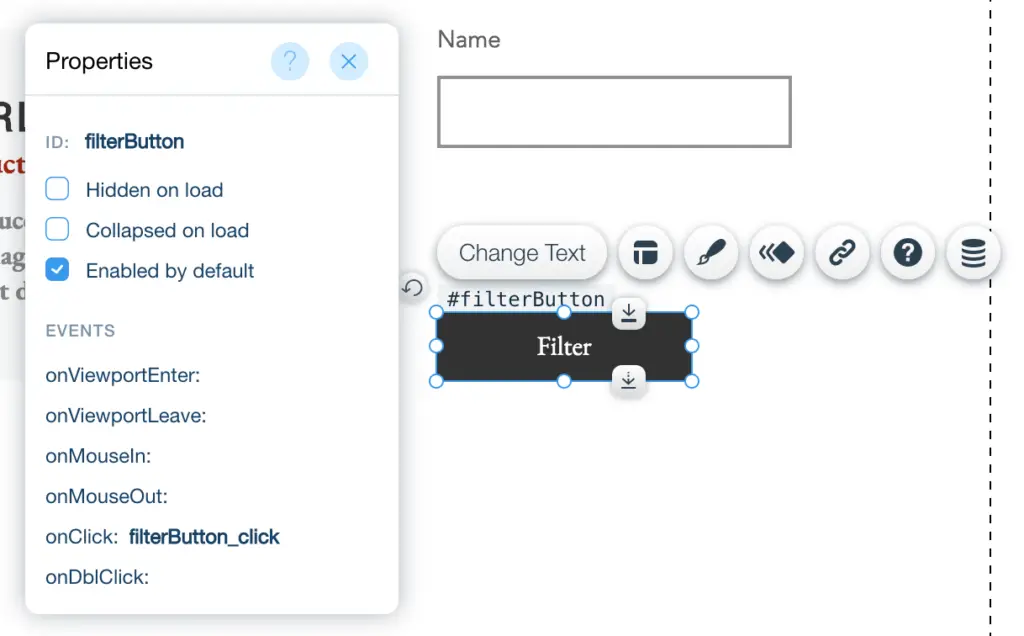 Filter button properties
Now you need to add some codes to the “Filter” button click event. The codes will alter the dataset by setting up a filter. Then you will see your repeater changes. The codes are below.
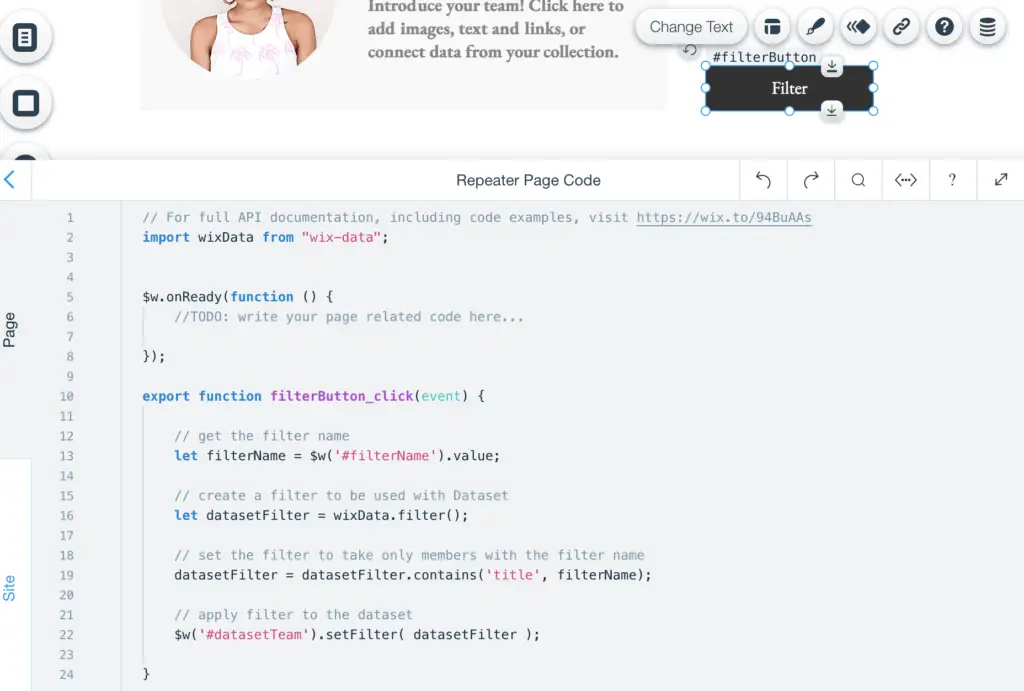
import wixData from “wix-data”;export function filterButton_click(event) { // get the filter name let filterName = $w(‘#filterName’).value; // create a filter to be used with Dataset let datasetFilter = wixData.filter(); // set the filter to take only members with the filter name datasetFilter = datasetFilter.contains(‘title’, filterName); // apply filter to the dataset $w(‘#datasetTeam’).setFilter( datasetFilter );}
 Repeater page code
I understand that many of you are not coders. You may find the codes hard to understand. But I try my best to explain them in English below.
- Line 2: need this line to use Wix Data. Wix Data provides the tools to read, write, and filter the data in your dataset and your collection.
- Line 10: when the user clicks on “Filter” button, the codes inside this function are executed.
- Line 13: read the name on the name input box, then assigns the name to filterName variable.
- Line 16: ask Wix Data to create a filter.
- Line 19: add filter details to the filter. More specific, tell the filter to search for team members whose name has the filterName.
- Line 22: apply the filter to the dataset, and let the dataset perform its magic on the repeater and the imagination.
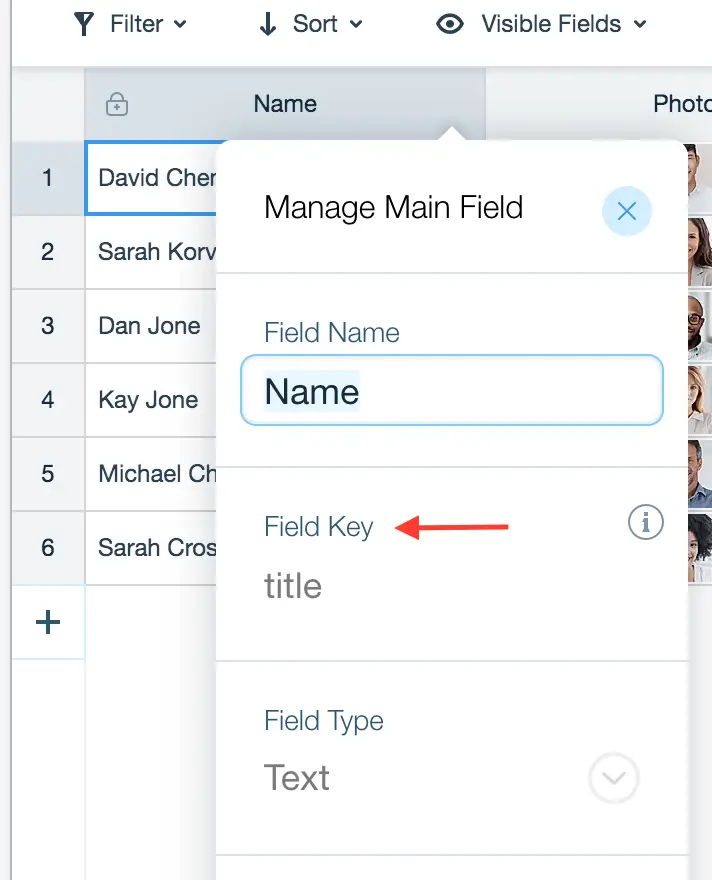
You notice there is no “Name” field in my codes. Line 19 has “title” instead. It is not a typo. I have to use ‘title’ because ‘title’ is the field key for the “Name” field in the team collection. Sometimes the field keys and the field names are the same. But most likely they are different. Always use field key for your coding.
To see the field key, you open your collection. Right click on the field. Select “Manage Field” item.
 Display Field Key
To test your creation, you need a better data in your collection. Right now It doesn’t make any sense. For example, all team members have the same job title. I change the collection data so that I can test it. See my collection data below.
 Team collection data
In preview, type “Jone” into the Name box. You see there are only two pages on the pagination. One page is for Dan Jone. The other page is for Kay Jone. It is working.
Filter Repeater For Job Title
What about you want more filters? It is a very valid question. In reality your site needs more complex data manipulation. For example, multiple levels of filters. One simple filter like the above example doesn’t cut it. Luckily the implementation for multiple filters isn’t complex. If you follow the same principle, you get it done easily.
Let’s add a Job Title filter. Click “Add” icon. Select “User Input”. Select “Text”. Add another text input for the job title. Set ID property of the Job Title input to be “filterJob”.
 Add job title filter
The functionality of the filter button changes a little. It applies both name and job title filters to the dataset. The dataset then searches the team members, and displays the result on the repeater and the pagination. Therefore, the codes in the above example must change as below.
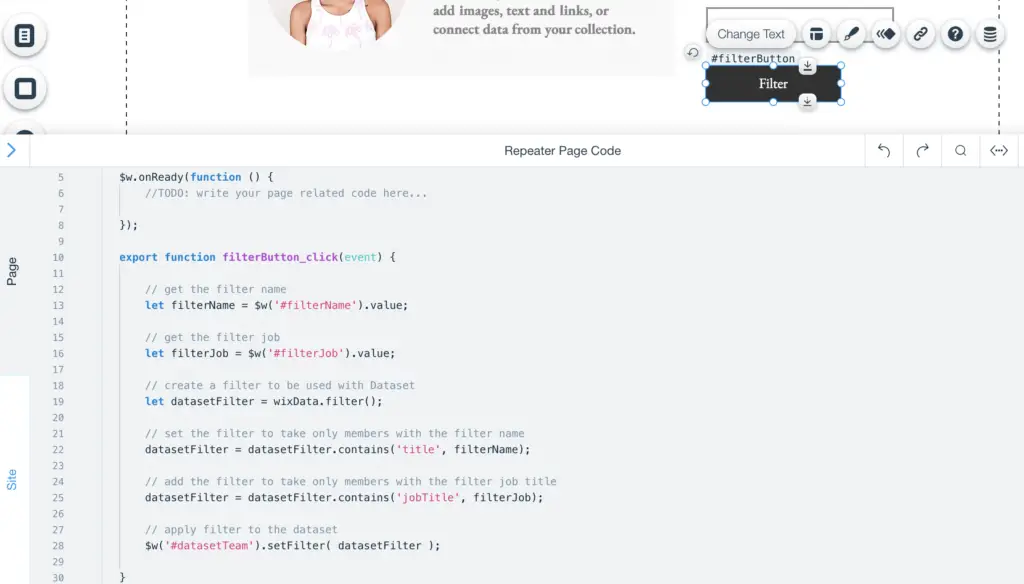
import wixData from “wix-data”;export function filterButton_click(event) { // get the filter name let filterName = $w(‘#filterName’).value; // get the filter job let filterJob = $w(‘#filterJob’).value; // create a filter to be used with Dataset let datasetFilter = wixData.filter(); // set the filter to take only members with the filter name datasetFilter = datasetFilter.contains(‘title’, filterName); // add the filter to take only members with the filter job title datasetFilter = datasetFilter.contains(‘jobTitle’, filterJob); // apply filter to the dataset $w(‘#datasetTeam’).setFilter( datasetFilter );}
 Repeater page code
Explanation for the codes added is below:
- Line 16: read the job title in the input box, and assign value to filterJob variable.
- Line 25: add job title condition to the filter.
- Line 28: apply the filter to the Team dataset and let it do the rest.
Conclusion
Now you can preview your site and see the multi filters in action. The message you should take away from this tutorial is that don’t change the repeater and the pagination. You should always change the dataset instead. Ignore the pagination API.
If you need multiple filters for your repeater, you apply the filters to the dataset, and let it do its job on the repeater and the pagination. If you need to change some data on your repeater, you change that data in the dataset, and let it perform the magic on the repeater.
I hope the tutorial is helpful. If you have any question, put it in the comment section below. I will try to help.