Printify And Wix Shipping Setup
I was expecting a flat rate shipping cost from Printify, which would be easy to set up in Wix. But I was wrong. The shipping cost varies depending on the order quantities. It doesn’t make your job any easier.
It took me a few hours of researching and trial-&-error. But I finally found a way to set up Printify shipping costs in the Wix store. The secret sauce is to use the shipping cost by weight option. From the weight you can figure out how many products are ordered and calculate the shipping rate accordingly.
The instruction is below.
1. Understand Printify Shipping Cost
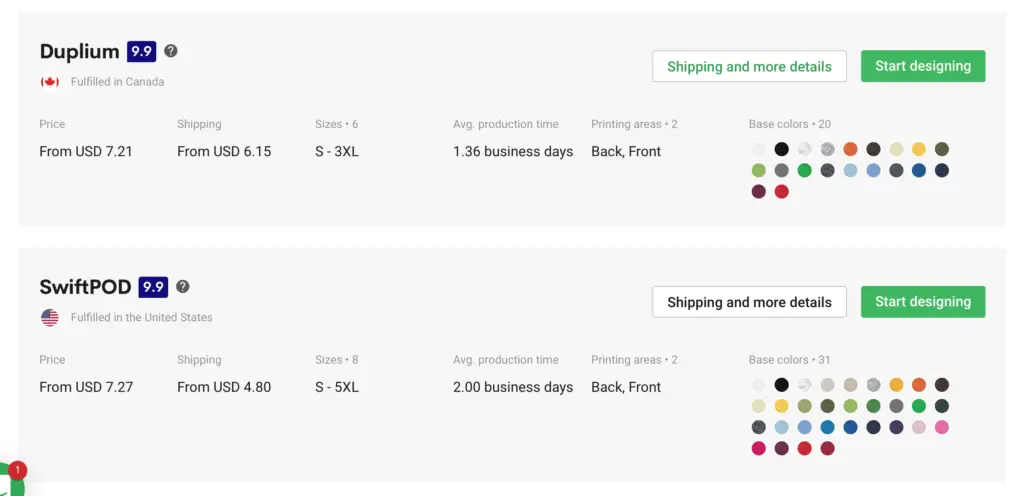
Printify allows you to select a provider for your products. Each provider is located in a different region. Therefore, each provider has different shipping costs.
Your first task is to know precisely the shipping costs of each provider. You will lose sales if your shipping cost is too high. Or you will lose money if you under-charge for shipping and must subside each order. So this is an important task.
The steps to view the Printify provider shipping cost are below
- Select the product in Printify, then select the provider
- Click “Shipping and more details” button
2. What is the product weight?
Because you are going to use product weight to determine the quantity, and the shipping rate. You need to find the weight of each product.
But you soon find out that very light weight items like t-shirts and phone cases don’t have a weight. The heavier items like coffee mugs however do have a weight (in oz).
Fortunately you don’t have to know the precise weight. I personally use 1 lb for every product I set up on Wix. It is just easy to do any calculation with number 1.
3. Calculate the shipping cost based on the weight
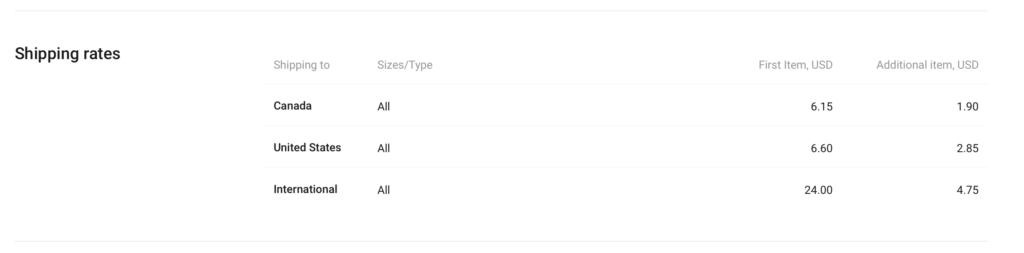
When your customers check out, Wix determines the shipping cost based on the total weight of all the products in the order. For example, if a t-shirt weight is 1lb, and the customer orders 10 shirts, the total weight is 10 lbs. Then Wix looks at the shipping cost table (like the below) to determine the cost for shipping 10 lbs.
Wix will ask you for the weight and the cost while you are setting up the shipping rate. To save the time and stress, I highly recommend creating the below table before you do anything on Wix.
Basically the table has 3 columns: number of products, the weight, and the total shipping cost. You start with the number-of-product column. Place one number from 1 to 10 on each row. Then calculate the total weight of the number of products on that row. For example, if the t-shirt weight is 1lb, an order of 3 t-shirts has a weight of 3 lbs.
Then calculate the shipping cost based on the number of products. For example, the shipping cost for the first t-shirt is $6.15, any extra t-shirt costs another $1.90. Therefore, the total shipping cost for 5 t-shirts is 6.15 + 1.90 * 4 = 13.75.
Please note that the shipping cost isn’t the same for every region. You should create one table for every region.
| Number of T-Shirts | Order Weight (lb) | Shipping Cost (Canada) |
| 1 | 1 | 6.15 |
| 2 | 2 | 8.05 |
| 3 | 3 | 9.95 |
| 4 | 4 | 11.85 |
| 5 | 5 | 13.75 |
| 6 | 6 | 15.65 |
| 7 | 7 | 17.55 |
| 8 | 8 | 19.45 |
| 9 | 9 | 21.35 |
| 10 | 10 | 23.25 |
4. Add new shipping regions on Wix
By default Wix only provides 2 regions: domestic and global. If you are in the US, the domestic region is the US, and the global region is the rest of the planet.
But if your supplier has different shipping costs for Canada vs Japan, you should create Canada region and Japan region for more accurate shipping cost calculation.
In this example, there are 3 shipping regions: Canada, US, and International
Steps to add new region
- Navigate to Store Shipping Setting
- Click Add Region button
- Select one or multiple countries in that region
5. Set up Printify shipping rates on Wix
Now you get to do the fun stuff: enter the shipping rates to Wix store. Follow the steps below to do so.
- Navigate to Store Shipping Setting
- Click Domestic (United State) region
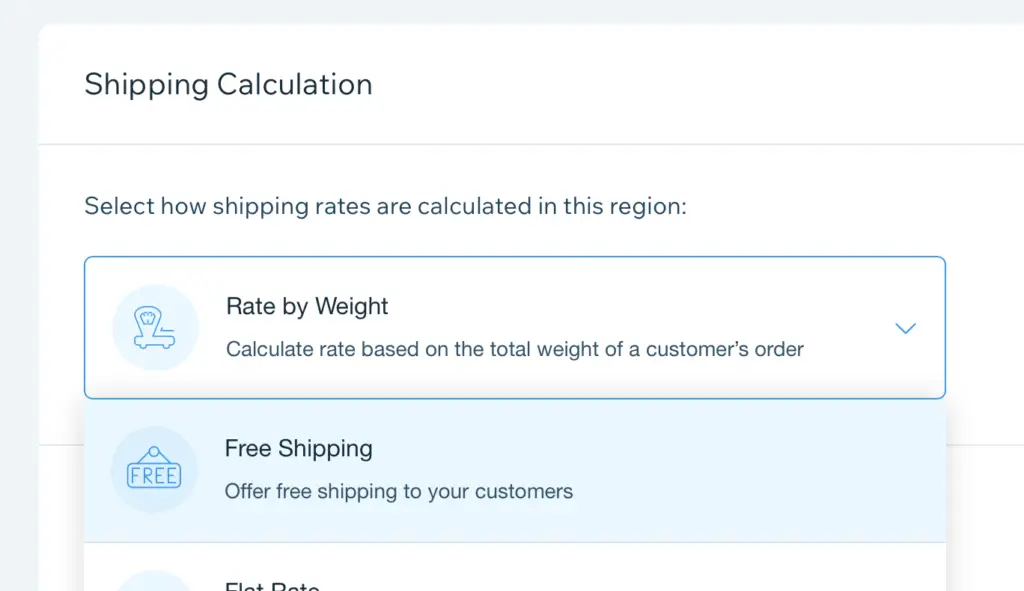
- Select Rate by Weight option
- Enter Delivery Option Name
- Enter Est. Delivery Time (this is optional but highly recommended)
- Enter Weight Range and Rate with data from the above table
- Click Add Range if need to enter more
- Click Save after complete
6. Offer Free Shipping
This setting is optional since its benefit is to market your store better. Your customers are more likely to buy when they see “Free Shipping”.
Also, Printify products are cheaper compared to Printful products. Including the shipping cost to the product price doesn’t inflate the price too much and doesn’t upset the customers.
To offer Free Shipping, you just edit the price and select “Free Shipping” option in Store Shipping Setting
Please like and share if you find the article helpful. Check out my other articles for more useful tips