In Depth Wix User Input Control
Every time you ask the users to enter their information on your Wix site, you face the below challenges:
- How do your users enter their info?
- How do you validate your users’ info?
- How do you communicate the errors to your users?
- How do you reformat your users’ info?
The below instruction will help you solve all the above challenges. You will have a complete understanding about user inputs by the end of the instruction. Let’s jump right into it.
How to Add User Input on Wix
For example, you want to collect your website visitors’ contact phone numbers. Your first step is to add a user input for phone numbers on your site.
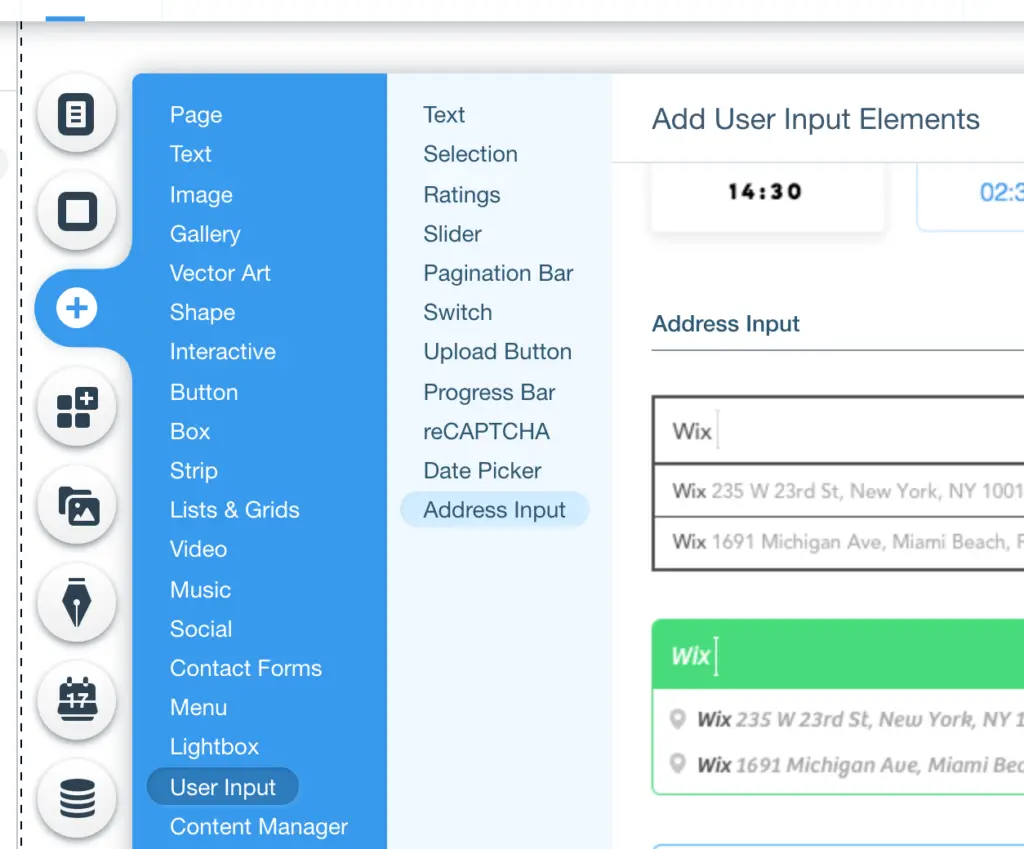
Wix gives you a lot of options. However, each option is for a different type of data. If you want the users to pick a date, you use “Date Picker” option. If you want the users to enter their addresses, you use “Address Input” option. Click the “Add” icon and select “User Input” to see all options available.
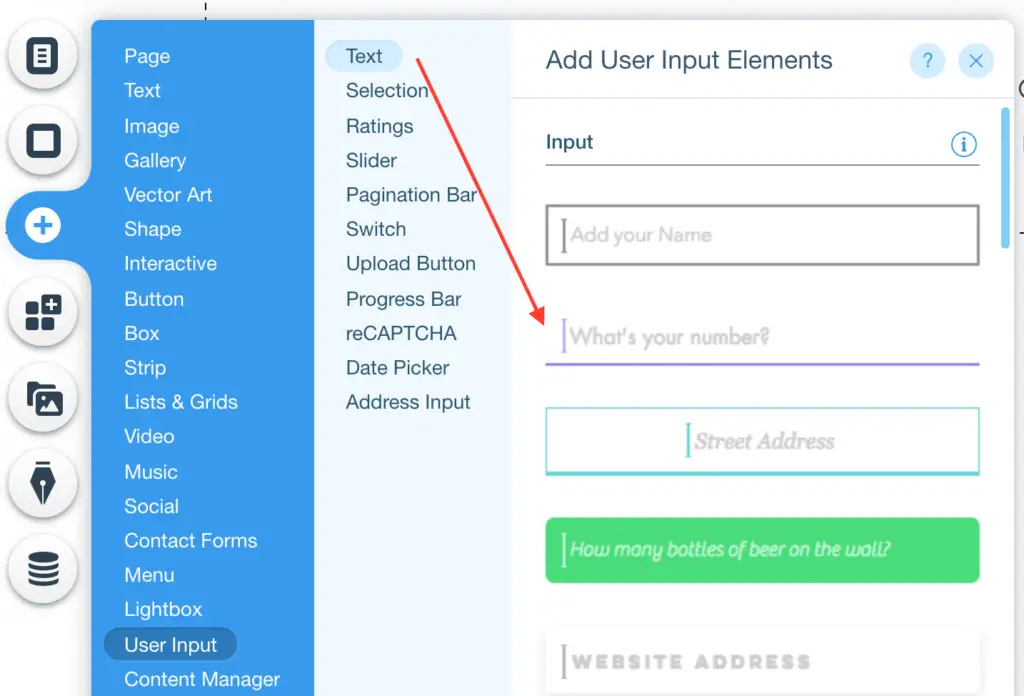
It will take weeks before you master all the user inputs. To keep this tutorial short and sweet, I will show you how to use “Text” user input, which is very common. So let drag and drop “What’s your number?” Input to your site.
Each user input has “Settings” and “Properties”. The settings are very basic configurations for your user input. You don’t need any programming skill to work on it. In case the settings don’t have the functionality you look for, you can use Wix codes to enhance the user input. The properties have information necessary for coding.


As you see in the screenshots, there are so many items on those settings and properties. You may wonder what they are for and how to use them. You will learn that in the next section.
How to Validate User Input on Wix
You may worry that your users will make some mistakes. But this is every normal. It happens quite often to me. Because our visitors are normal human beings. They are not perfect. Therefore, you will need to validate their inputs after the users type it.
The validation varies in different situations. You don’t need any validation for the “Name” input. But you need a validation for the “Phone Number” input. You want to make sure the users enter digits for the phone number. If they enter alphabet character, your website must scream error.
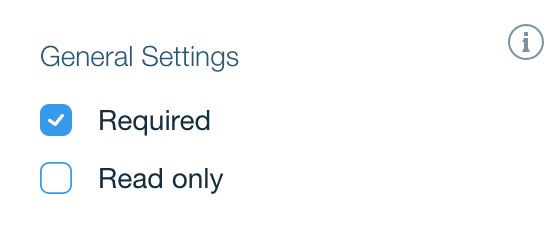
Required Setting
n this example, you right click on the user input and select “Settings”. Scroll down to “General Settings” section. Then tick the “Required” box. The “Required” setting forces the users to enter a value to the user input. Otherwise, it invalidates the user input by highlighting the input in red, and doesn’t allow to submit value.

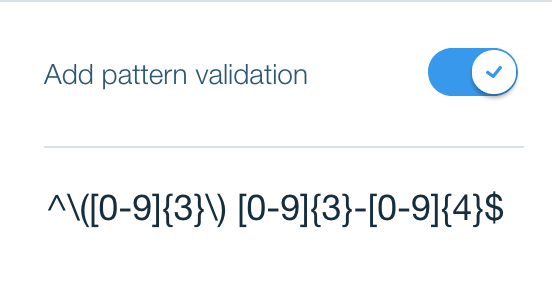
Pattern Validation Setting
Another validation you may be interested in is “Add pattern validation”. When you switch it on, Wix checks the pattern in the user input. A specific example: you want the phone number to be in the format (123) 456-7890. But the user enters 123-456-7890. The pattern validation screams an error.
For this phone number input example, I switch on “Add pattern validation” setting and add the Wix phone number regex ^\([0-9]{3}\) [0-9]{3}-[0-9]{4}$.
In case you don’t know what Regex is, Regex is the language to describe pattern. I have to admit that the regex confused the heck out of me when I first saw it. If you are confused, you are not alone. You can learn and practice the regex at https://regexr.com. It takes time. For now, you find the explanation for the phone number regex below.
- ^ : Begin of the input value
- \( : Character “(“
- \) : Character “)”
- [0-9] : Character from 0 to 9
- {3} : 3 characters
- [0-9]{3} : There are 3 characters. Each is the character from 0 to 9
- – : Character “-“
- {4} : 4 characters
- [0-9]{4} : There are 4 characters. Each is the character from 0 to 9
- $ : The end of the input value
Properties
Okay. You check out all the settings. But none of them matches your requirement. Then your next solution is to use the big gun. I don’t mean shooting your laptop. I mean you need to do some programming work. Don’t let the task intimidates you. You can do it yourself if you are a programmer. Or you can pay a freelance developer to do it for you. It doesn’t cost much.
However, you do need to know the basis. Just a few things.
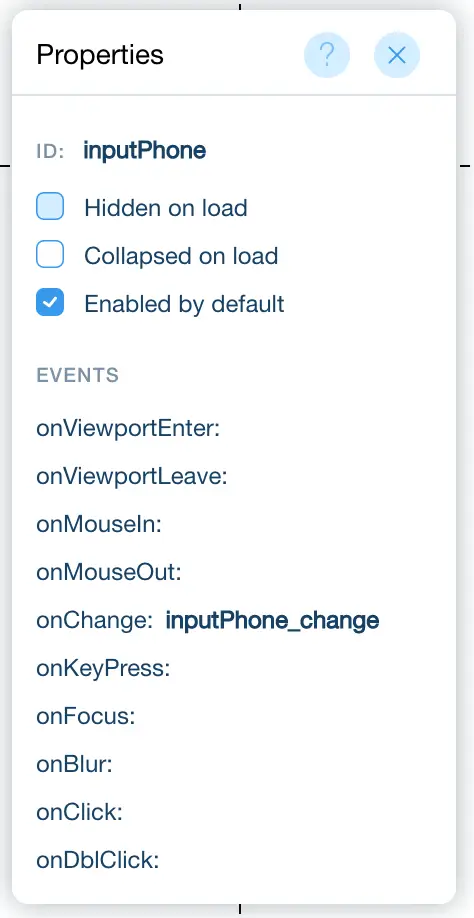
Every user input has an “ID”. It is the name of your user input so that Wix understands which input you refer to in your program. Always give your user input a meaningful name/id. Or you will be confused later.
In this example, I name the phone number input as “inputPhone”. In my program, I write codes $w(‘#inputPhone’) to tell Wix to look at my phone number input and perform some actions.

Now I want you to observe “Properties” window again. Right below the “ID” property is the “Events” section. What are they? In my grandma term, an event is an action on the user input. For example, when you type your phone number, you change the input value, you trigger a “change” event. When you click on the input, you trigger a “click” event.
You add an event here in case you want Wix to perform some actions following that event. For example, on a nice Friday morning, my site is ranked low in the user friendliness because some users complain that typing phone number in the format (123) 456-7890 is too much work. Now I only ask the users to enter phone number without any “(“ or “-“. I make Wix do the formatting for the users.
Wix corrects the format only when the users change the input value. Therefore, I need to add an “onChange” event. This event triggers Wix codes to perform the formatting action. Check out the phone number user input properties and coding below.

export function inputPhone_change(event) {

    //Get unformat phone number from phone number user input
    let unformat = $w('#inputPhone').value;

    //Put phone number in format (123) 456-7890
    let format = "";

    for (let i = 0; i < unformat.length; i++)
    {
        format = format + unformat[i];

        if      (format.length === 1) { format = "(" + format;  }
        else if (format.length === 4) { format = format + ") "; }
        else if (format.length === 9) { format = format + "-";  }
    }

    //Put formatted phone number back to the phone number user input
    $w('#inputPhone').value = format;
}
Now when I enter 1234567890, I get (123) 456-7890.


Custom Validation User Input
I made Wix reformat phone number for my users. I am a genius. But a new problem arrives as always. Some hater on the internet puts “911” on my phone number user input. Now I want Wix to auto validate the phone number. If it sees “911”, it tells that hater “Evil”.
Wix development team takes life too seriously. Of course, they don’t have any validation setting for my silly requirement. But I can achieve it with “Custom Validation”.
Custom validation doesn’t appear in the properties of the user input. You can only access it through Wix codes. It enables you to do all kinds of validations. Even the silly one above. Keep in mind that custom validation is like an event. When the user input is changed by either users or programs, the custom validation is triggered to perform custom validation.
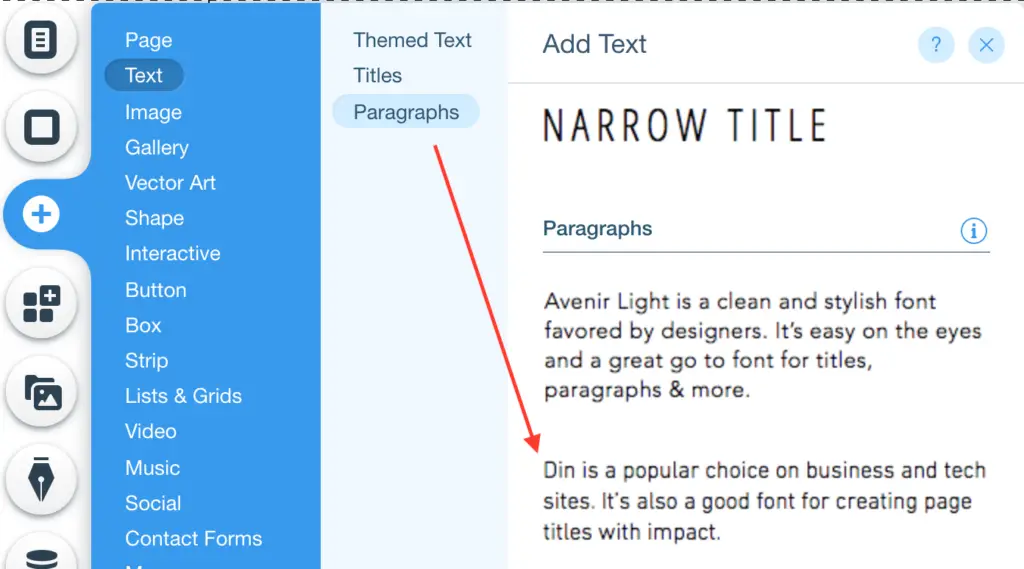
First I need a text element to display “Evil” to the screen. Click “Add” icon. Select “Text”. And pick anything under “Paragraphs”.
I name it as “textError” in the ID field

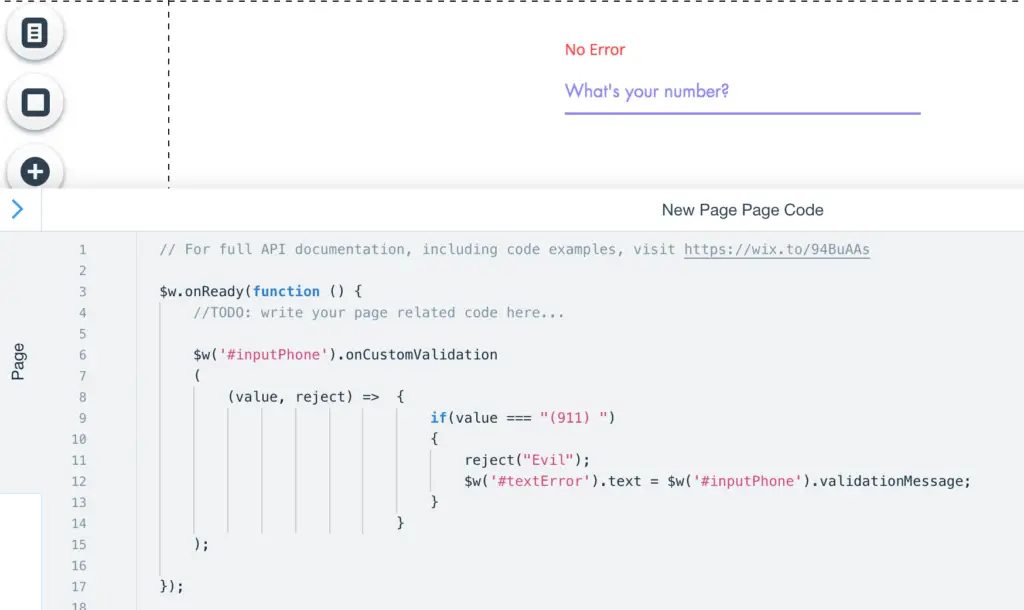
My next task is to trigger the custom validation. I do so with the codes below.
When the phone number user input changes, custom validation triggers, the validation function is called.
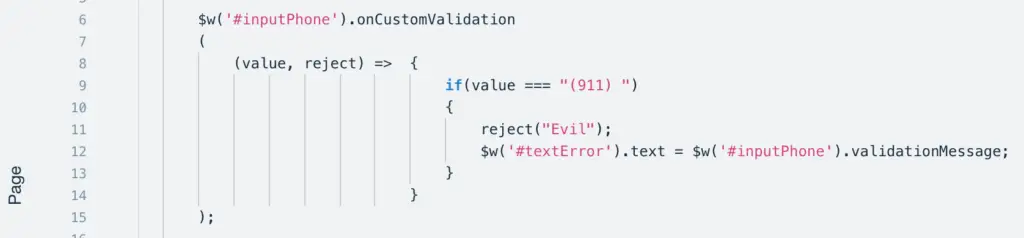
Take a look at the screenshot below. The validation function (line 8) takes two parameters: value and reject. The value is the value of the user input. You check the value to see if it is valid. If it is not, you call the reject function with the validation message (line 11). The message is “Evil” in this case. The message is then assigned to validationMessage of the phone number input.
My last task is to display the validationMessage to the text element. I do so on line 12.
Keep in mind that the user input is ready for validation only after the page is loaded. Therefore, I must put $w(‘#inputPhone’).onCustomValidation (…) inside $w.onReady(function () { … }.
Finally, I ran a test and got the happy ending below.

Conclusion
I hope you learn a great deal about user input in Wix. The final section is quite technical. But thank you for staying. You know how to add a user input, how to custom validate user input, and how to reformat user input. That is a lot of knowledge. But the more you use them, the easier they become. Let me know if you have any question in the comment below.