How to use the rulers in Pages on Mac
Speaking from experience, I always fought aligning elements like texts and pictures difficult in Mac Pages. The reason was that there was no grid line to help the element snap into place. Until recently I discovered that I could create those grid lines by using the ruler feature of the Mac Pages.
The below instructions will reveal the functions of the rulers in Mac Pages and show you how to use them to make your life easier.
01. How to display the horizontal ruler
By default, Mac Pages doesn’t display any ruler on the screen. It used to make me think the ruler didn’t exist. Fortunately, you can turn it on when you need it. The ruler will show. But only the horizontal ruler appears. And the vertical ruler remains hidden.
The horizontal ruler will help you align your document elements like texts and pictures vertically.
The below steps show you how to display the horizontal ruler in Mac Pages.
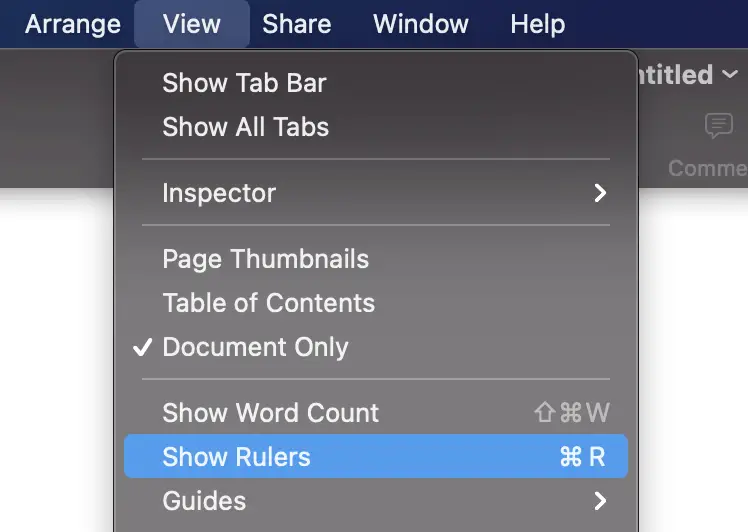
- Click the View menu
- Click the Show Rulers option
02. How to display the vertical ruler
When you display the ruler in the View menu, Mac Pages only shows you the horizontal ruler. However, the horizontal ruler cannot help you align the elements horizontally. Only the vertical ruler can do so.
After a little research, I found out that very few people used the vertical ruler. Therefore, Mac Pages hides it to have more screen space for something else. Fortunately, Apple doesn’t eliminate this feature completely. There is a setting in the Mac Pages Preferences to bring back the vertical ruler.
The steps below show you how to turn on the vertical ruler setting in Mac Pages Preference.
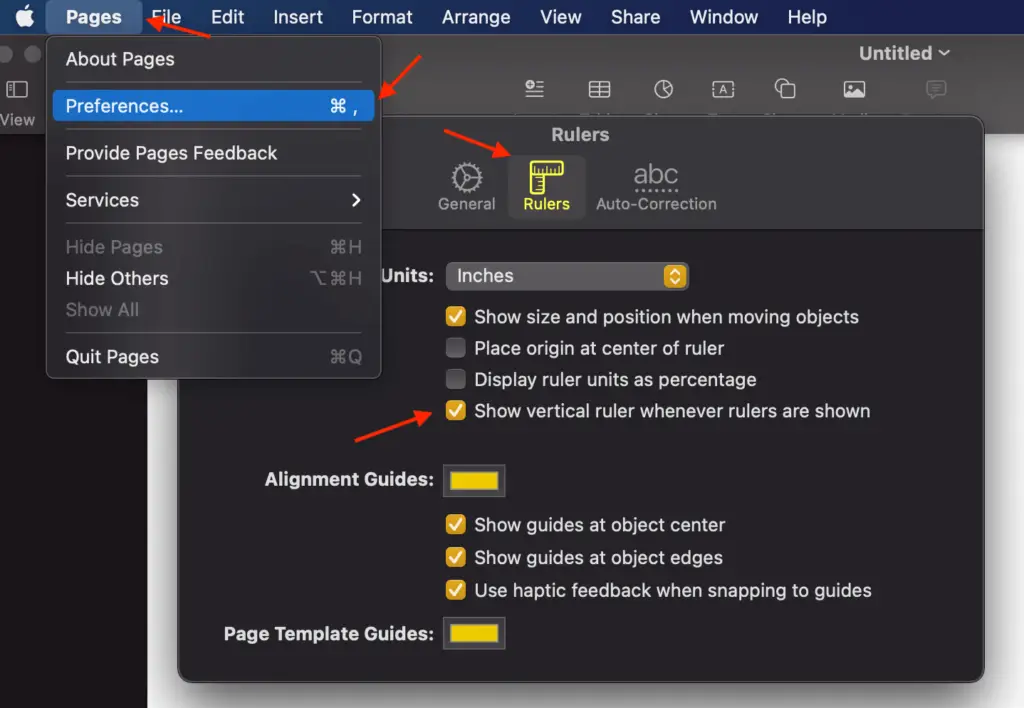
- Click the Pages menu
- Click the Preferences… option
- Click the Rulers icon
- Click Show vertical ruler whenever rulers are shown
Once the vertical setting is on, you can close the window. If you don’t see any ruler on your Mac Pages screen, you perform the steps below to show it.
- Click the View menu
- Click the Show Rulers option
03. How to change the ruler from inch to cm
Very few people in the USA use cm as the unit of measure. Mac Pages was made in the USA. Therefore, the inch is the default unit of measure in Mac Pages.
If you are in a different country, then you must use cm as the unit of measure. So how do you change the ruler’s default unit of measure from inch to cm? There is a setting for that in Mac Pages Preferences.
The steps to change the ruler’s unit of measure to cm are below.
- Click the Pages menu
- Click the Preferences.. option
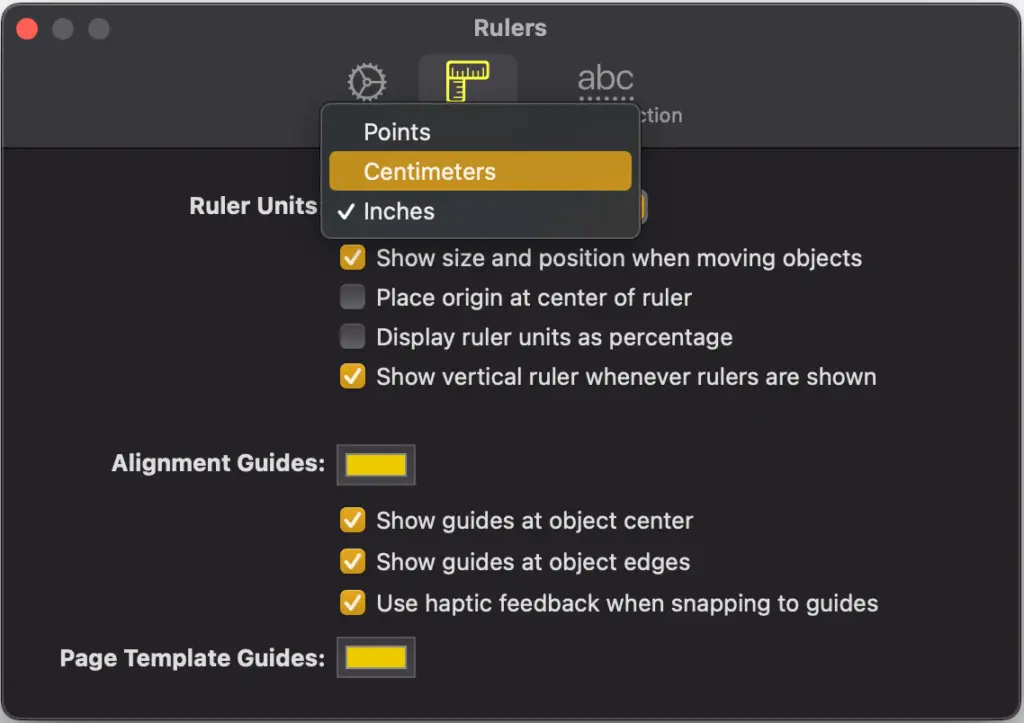
- Click the Rulers icon
- Click the Ruler Units dropdown menu
- Click the Centimeters option
04. How to create a grid line from the ruler
Once I see the rulers on the Mac Pages screen, I ask myself what I can do with those rulers. I was excited to learn that I can create many grid lines from the rulers to help align the texts and the pictures on my document.
Every time I move my texts or pictures close to the grid line, they automatically snap into place of the grid line like magic. It makes the alignment of many elements on the page so easy.
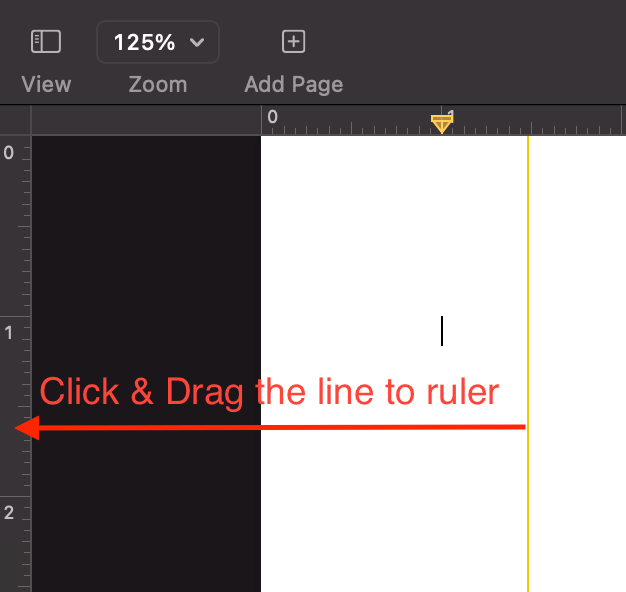
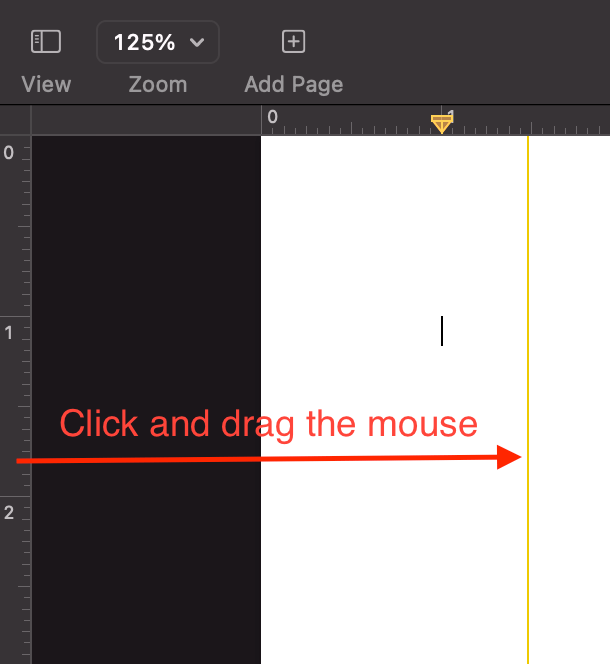
In order to create a grid line, you move the mouse on to the horizontal or vertical ruler, then you click the ruler, and drag the mouse out to the page area until the grid line reaches your desired position. You can repeat this process as many times as you would like. Each time you create one more grid line.
05. How to remove the ruler grid line
Once you are done with those grid lines, you may want to remove them so that the page appears less busy. In order to remove those grid lines, you click each line, then drag it to the ruler to make it disappear.