How to Sell Tickets Online for An Event
Want to sell your event tickets online with just a small fee?Below is the detailed instruction. It’s simple and takes you no more than anhour.
You must have a website if you want to sell online. But buildinga website from scratch takes a lot of effort. It’s a long route. And you arenot going to take that route.
Instead, you are going to use a simple drag-drop websitebuilding platform to build your ticket selling website. I will show you how touse Wix to achieve your goal. The steps are:
- Step 1: Sign up for a Wix account.
- Step 2: Create an event website.
- Step 3: Customize the event and tickets
- Step 4: Test your event website
Step 1 – Sign up for a Wixaccount
Sign up for a Wix account is FREE. It won’t ask you to enteryour credit card information. And you only need an email to sign up.
- Click “Sign In”
- Click “Sign Up”
- Enter your Email and Password*
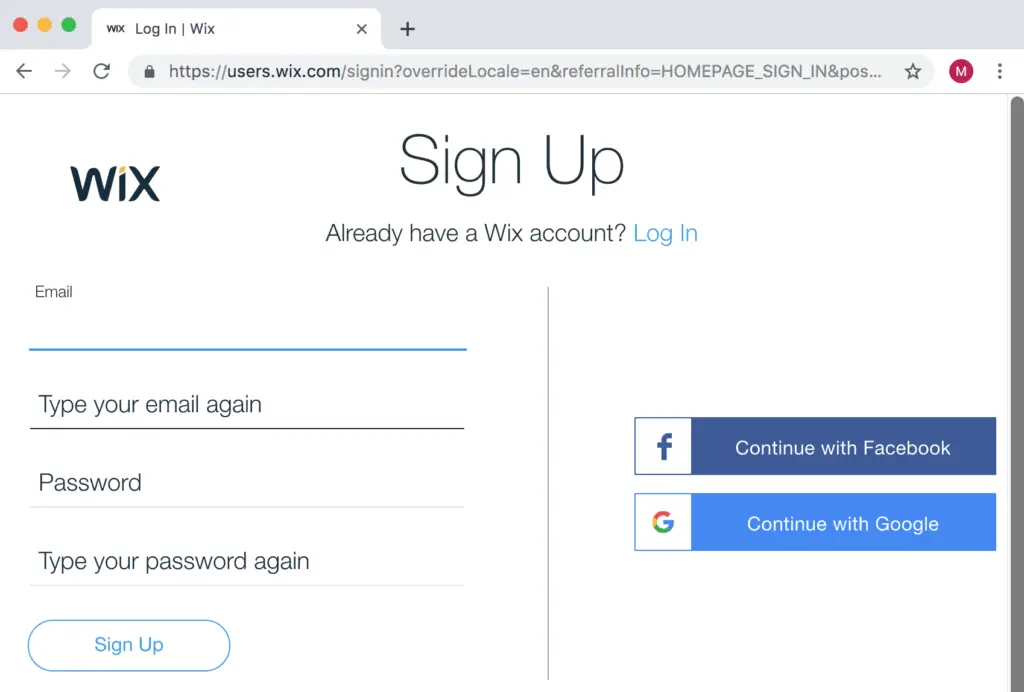 Enter your email, and create a password
Step 2 – Create an event website
Now, this is the fun part. The process is as follow. You letWix generate a site. You use the website to display your event information. Thewebsite also has a “buy ticket” button. When someone clicks on that button, Wixshows them the steps to buy the ticket (enter email, credit card, confirmation,etc… )
To generate a site, click “Create New Site”.
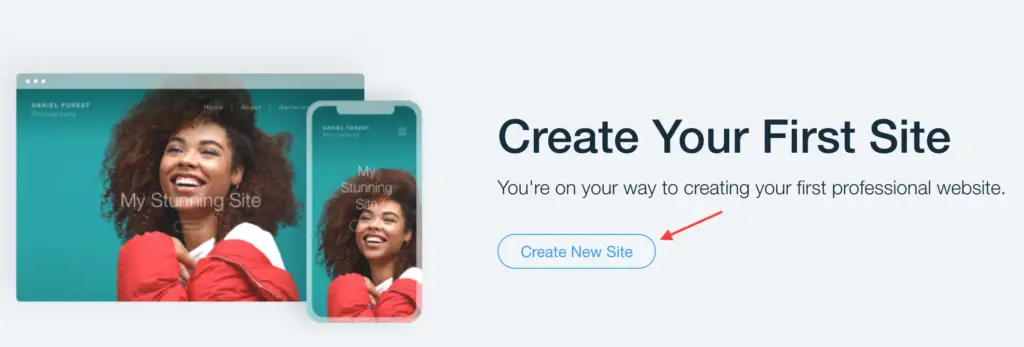 Create your event site
What kind of website do youwant to create?
You get asked the question every time you create a new siteon Wix. For your ticket selling website, you choose “Events >”.
Choose how you want tocreate your website?
I always go for “CreateYour Website with the Wix Editor”. Because you have more flexibility withthis option. You can customize the look and the feel of your site to fit yourneed.
Click “Choose aTemplate”
Pick the Events websitetemplate you loved
Here, you see a list of website templates optimized for lookand feel, and functionality. You just pick a free template most suitable foryour goal. Change a few things. Then your website is ready.
I am going to pick “One Day Festival” for the tutorial. I click on the template and hit Edit button.
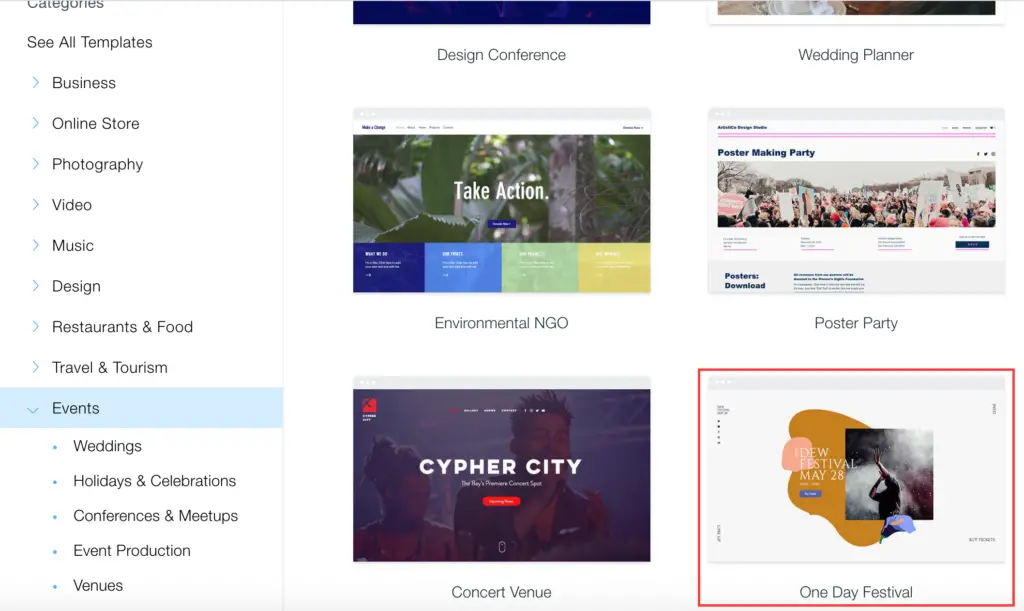 Pick one Wix template for your event
Customize your website
Wix redirects you to its website editor. Here you can click on any element (Texts, Pictures, or Backgrounds) and change it to your liking. Remember to click the “Save” button frequently. You don’t want to lose your work when the internet connection is lost.
 Save your work often
When you hit the “Save” button for the first time, Wix asks you to choose a domain. I always recommend “Get a Free Wix.com domain”. Because it’s quick and easy. Afterwards you send the domain to your audience so that they can access your website.
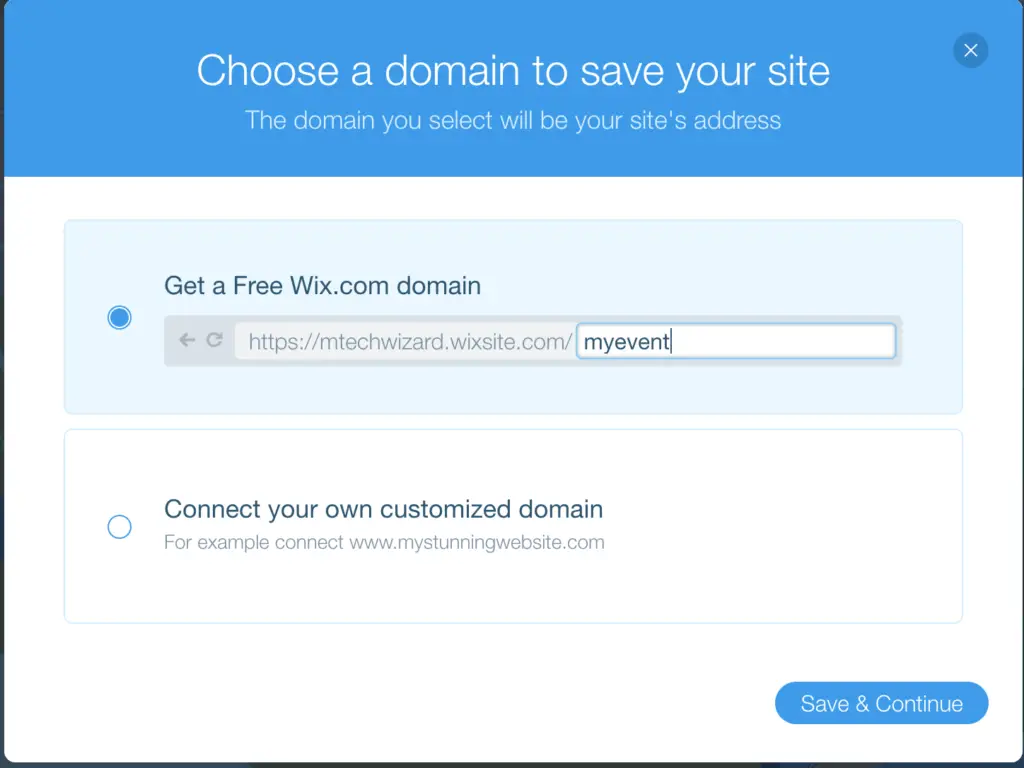 If you want quick and easy solution, get a free domain.
Changing website elements mean changing the look and feel ofyour website. This is always my favorite activity of building a website. I canspend hours on it.
But you come here to learn how to sell tickets online. I don’t forget that. So, let’s get right to it.
Step 3 – Customize the eventand tickets
You click on “Buy Tickets” button on the website in website editor. You will see the “Manage Event” button appear. Click on it.
 Find your Buy Tickets button
The Dashboardwindow appears. You enter your event information under “Event Details” tab, like Event Name, Date and Time, Location, etc.
Done that? Now click on “Create Event” button. Fix errors if Wix shows you any. Your eventis now created.
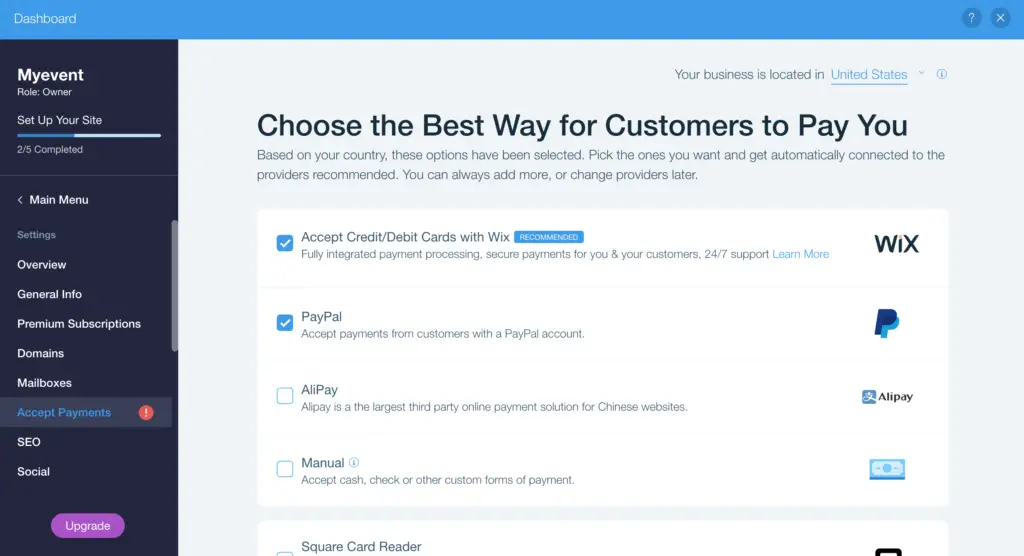
Before you can sell the tickets, you must set up at least one online payment method to accept payments from your customers.
Choose the Best Way forCustomers to Pay You
On the left-hand side menu, click “Settings”. Then click “Accept Payments” on the same menu.
 Payment Options for your customers
You have four payment options:
- Accept Credit/Debit Card with Wix
- PayPal
- AliPay
- Manual
AliPay is useful if the majority of your customers locate inChina. AliPay is very popular over there. You pick manual when you collect cashor checks from your customers.
The top 2 options, Accept Credit/Debit Card with Wix andPayPal, are adequate for most people and most events.
The first option, Accept Credit/Debit Card with Wix, asksyou to have a bank account to complete the setup.
PayPal option requires a business PayPal account. You cansign up for one on PayPal website (the link is here). *Remember when you createa business PayPal account, select the express checkout option.
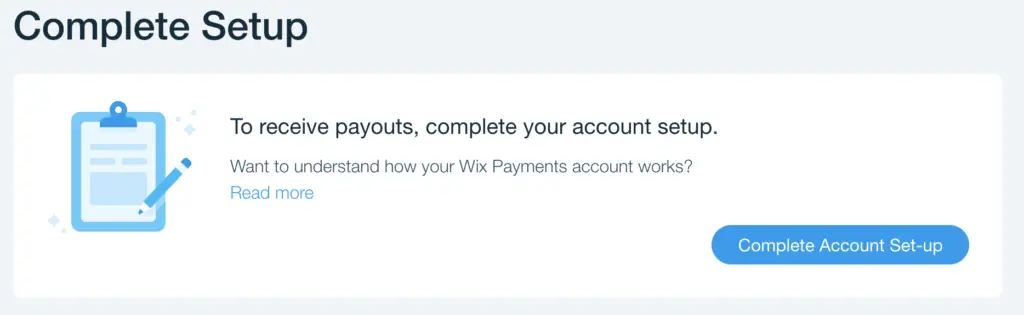
Now hit the Add button to complete set up the payment method.
 Complete Setup Payment Method
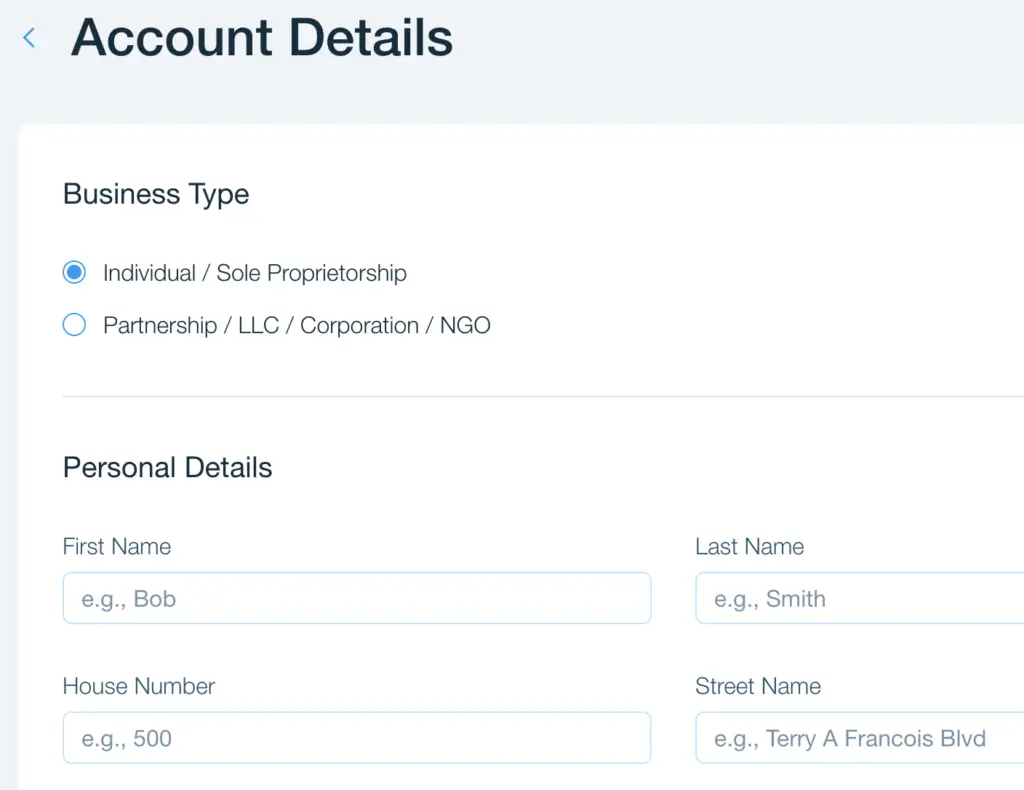
The last step is to enter bank account and business PayPal account. You click the “Complete Setup” link in blue. Then click “Complete Account Set-up” button. And enter Account Details.
 Link Wix with your bank account
 Your wallet details
Upgrade Your Wix Plan
The free Wix account won’t allow you to accept the payments from your customers. You need a premium plan Upgrade.
 Upgrade to get paid
No worry! The monthly fee is low. About the price of a restaurant meal. When you just start out, I recommend “Business Unlimited” and “Business Basic”.
 Those two are perfect
Business Basic is perfect for one-time event. The event isonly a few months away. You will close the website once the event is over.
However, if you decide to have multiple events, you betterkeep the website and pay the least fee to maintain it. The business Unlimitedis perfect for it.
Ticket Options and ThePrices
Payment method setup is now complete. We can refocus on the tickets again. Navigate to the “Events” menu and hit “Edit” your event
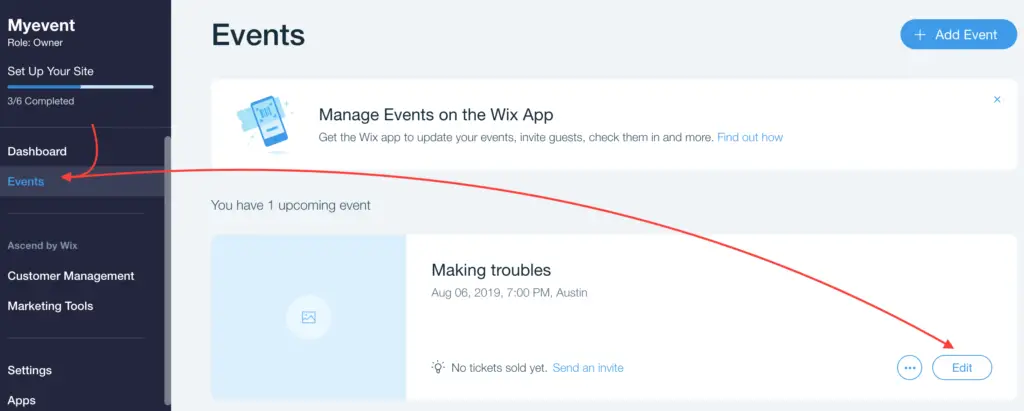 Navigate to your ticket options
On the Tickets tab, you are able to create multiple ticket options. Each ticket option has a different price and a limited quantity. You also have the option to create FREE tickets.
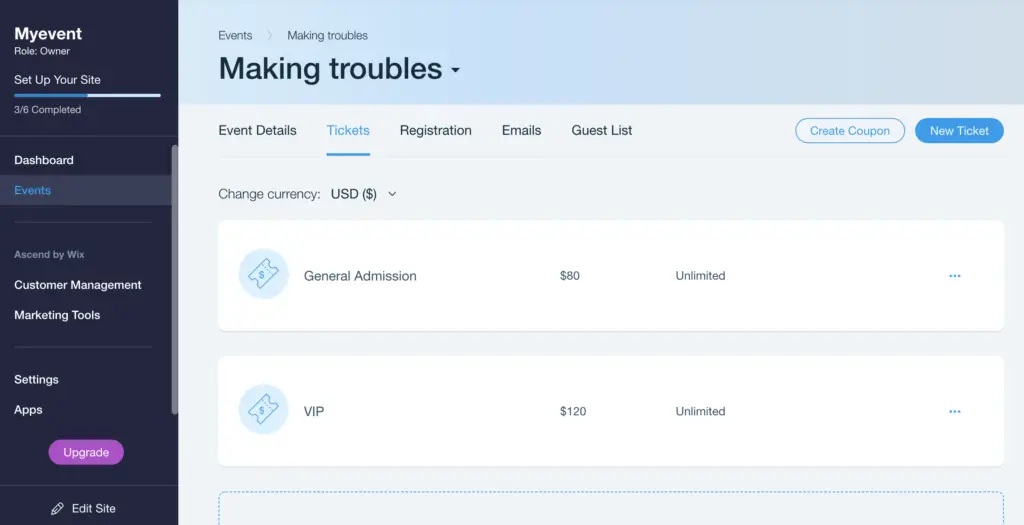 Click Tickets tab
Hit “New Ticket” button, and configure your ticket option. Then “Save” your work after finish.
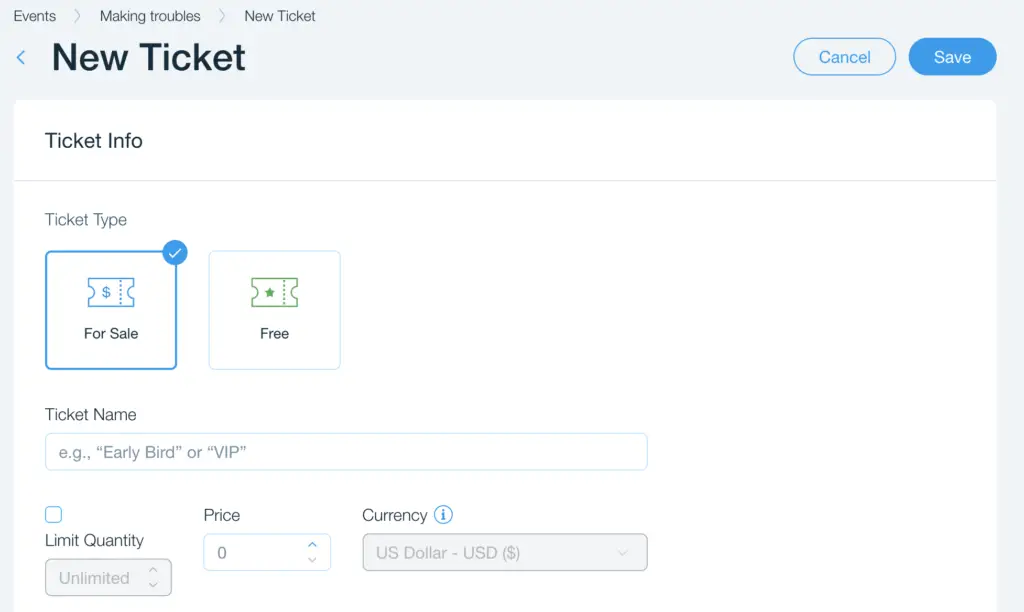 Configure your ticket options
Email Communication
No ticket buying experience is complete without thefollow-up emails. Email communication is very important.
You must have at least 3 emails ready to be sent to yourcustomers: confirmation, reminder, and cancelation.
The first email is the ticket confirmation email. You sendthis one out immediately after the customer purchases your ticket. Just so yourcustomer has a peace of mind. He knows he buys the ticket from a trusted site.
The second email is the event reminder email. Often thecustomers buy the tickets months in advance. They may forget the event after awhile. Too many distractions nowadays. It is a good idea to remind them aboutyour event when it is in very near future.
The last email is the cancelation email. I personally hopethat you never have to send this out. But life is unpredictable. You preparefor the best, and for the worst. In the worst-case scenario, you must cancelyour event, you send this one out.
Wix has 3 of them ready for you. You find them on “Emails” tab. If you don’t like the standard templates, you can also change them by clicking the “Edit” button.
 Email Communication
That’s it! You completed all the steps to build an eventwebsite. The next crucial step is to test the site and see your site in action.Now hit that “Edit Site” on the left-handside menu please.
Step 4 – Test your eventwebsite
You click “Preview” near the top right corner to test run your website.
 Preview before Publish
Then you click on any “Buy Ticket” button. The button will take you to the ticket option page. Here you choose the number of tickets then “Checkout”.
 Grab a ticket and Checkout
After the Checkout, Wix lets you know that you have reached the end of the check preview. However, you can continue to test your ticket purchase by selecting option “I just want to test a ticket purchase”.
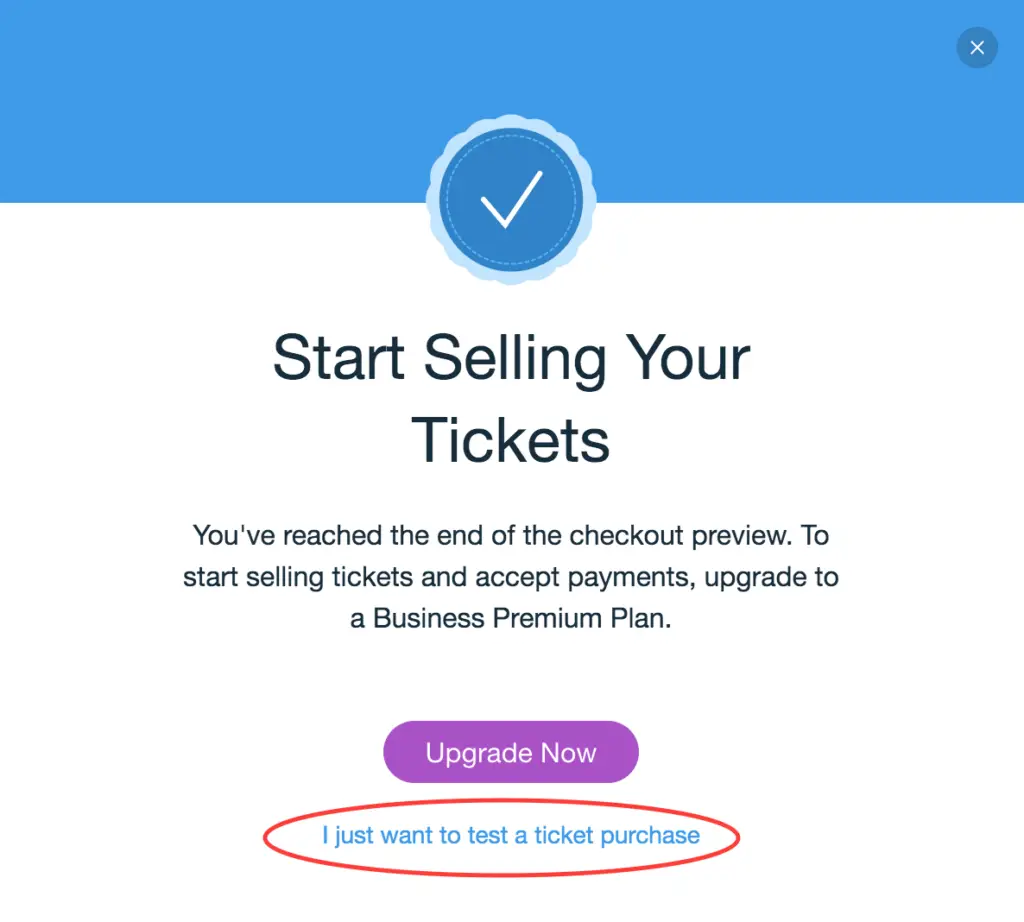 Let me test one more step
The true test is after publishing your website. Whatever youexperience now is what your customers will experience. Therefore, I suggest youto do a real ticket purchase transaction on your website, see the result, thenpublish the link to your potential customers.