How to change the shape of a picture in Mac Pages
“A picture worth a thousand words”. I hear that line so many times. And I try to add pictures to my documents whenever possible. The only problem is that each picture has a different shape and size. I must change the shape of the picture to fit into my documents.
The question is, “How can I change the shape of a picture in Mac Pages?”. There are two methods to do so. The first method is to use the mask feature of Mac Pages. The mask has many different shapes. Putting a mask onto a picture will change the picture’s shape. The second method is to use the picture as the background of a shape. The instructions below will show you the details.
01. How to change the shape of a picture in Mac Pages using a mask.
As I mentioned above, a mask with different size and shape can be used to alter the size and the shape of a picture.
If you decide to go this route, the first task is to decide what the shape of your desired picture is. For example, if I want my picture to appear round, I need to choose a mask with a round shape.
The below steps show you how to select a mask for your picture.
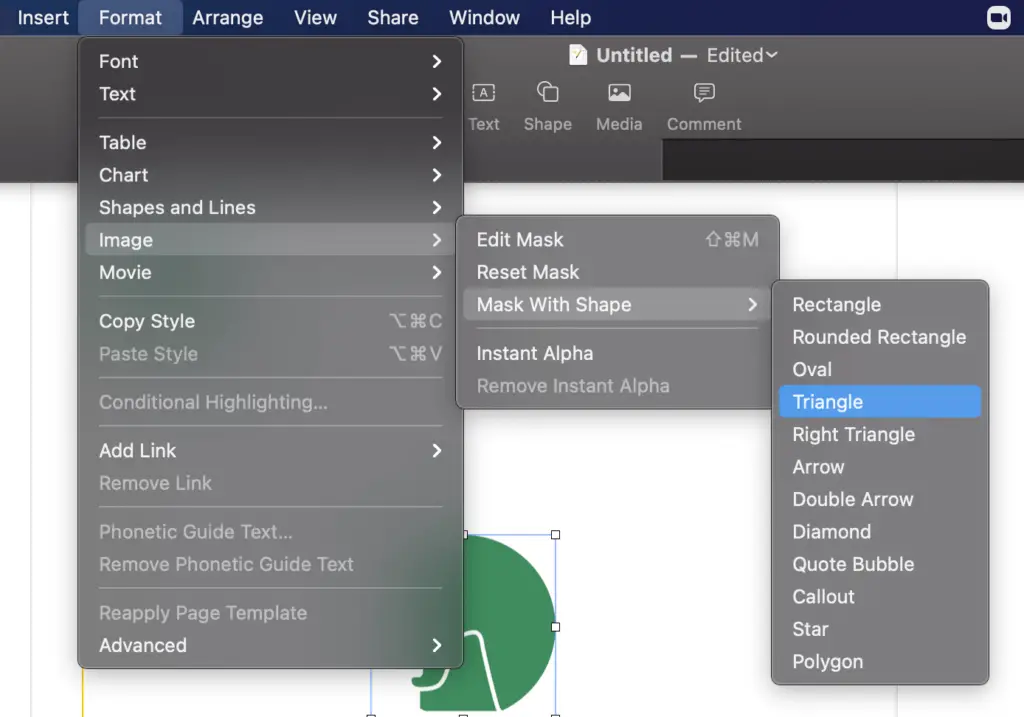
- Click your image
- Click the Format menu
- Click the image option
- Click the Mask With Shape option
- Click the Triangle option (you can choose a different shape)
Most likely the mask doesn’t fit your image. The mask can be too small for the image. Or the mask covers the parts of the image that should not be covered. The good news is that there are easy solutions for those problems. Mac Pages does allow you to change the image size and the image position to fit into the shape nicely.

02. How to make round corner image in Pages on Mac
Once you know how to use the mask feature to alter the shape of an image, you can achieve this round corner image easily.
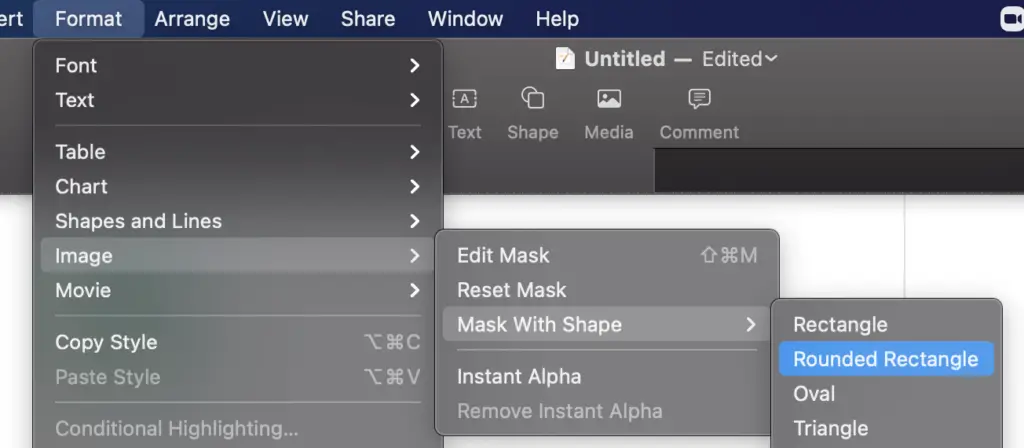
Mac Pages offers a rounded rectangle shape. If you add a rounded rectangle mask to your image, you will be able to make a round corner image. The steps to select a rounded rectangle mask are below.
- Click your image
- Click the Format menu
- Click the image option
- Click the Mask With Shape option
- Click the Rounded Rectangle option
03. How to change the shape of a picture without using a mask
If you use a mask to reshape your picture, your options are limited. You only have 12 shapes to choose from. If you want a more creative shape outside of the list, you cannot use it with the mask feature. But there is another solution.
You can use a shape. Any shape of your liking. For example, a shoe. Then you have to do the following trick to add your picture to the shape. The trick is to select your picture as the background of the shape.
The steps below show you how to add a shape and select the picture for the background.
- Click the Shape icon at the middle of the page
- Click the T-Shirt shape to add to the page
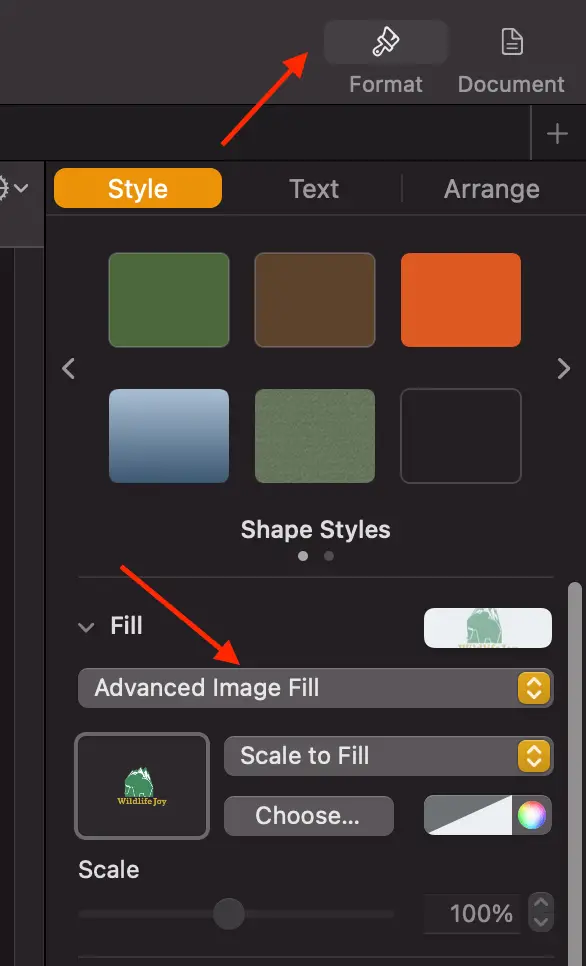
- Click the Format icon
- Click the Style tab
- Select the Advanced Image Fill option in the Fill section
- Click the Choose… button
- Select your image

The result is that the shape of my T-shirt below has the picture on it. The downside of this approach is that you don’t have the option to change the size and the position of your picture to fit your shape. So I rarely use this method. But I think you should be aware of it. You may need it someday.