Building an Email List for FREE with Wix
Want to build an email list without spending a fortune on
expensive software? I will show you how to build your email list completely
FREE with Wix.
It is a five-step process:
- Step 1: Create your lead magnet
- Step 2: Create your Wix lead capture page
- Step 3: Create the confirmation email with lead magnet download link
- Step 4: Test your lead capture process
- Step 5: Publish your landing page
Step 1: Create Your Lead Magnet
Many visitors come to your website once, then never come back. It doesn’t always mean your product or your content is bad. Simply your visitors get distracted by other stuffs in life. They don’t remember your website.
You can recover some of those visitors by sending them
emails, offering lots of value, and encouraging them to come back. To do so,
you must be able to capture their contacts. This step is called “Lead Capture” in email marketing.
Traditionally, business owners have to create a landing
page, then pay money to host the landing page somewhere on the web, then pay
more money to get an email marketing software. The total cost is expensive.
But why pay a lot of money while you have a pretty good free
option? Wix email marketing is FREE.
You know you must capture your visitors’ emails. Soon you will
learn that it’s not easy. People don’t give out their personal emails for no
reason.
The easier way is to offer them something valuable in return
for their email. This item is called “Lead
Magnet”.
Your lead magnet doesn’t have to be gold or diamond. It can
be a weight loss recipe, a soundtrack composed by you, or a tip on how to clean
the house. Just something small but useful from you.
If you already have a lead magnet, that is great. If you
don’t, I would suggest you to create one.
Another important point is that you should put the content
of your lead magnet in the file formats like pdf for document, mp3 for
soundtrack, or mp4 for video. Because it is so easy to distribute them through
the internet. Those files can be opened on any device.
Step 2: Create Your Wix Lead Capture Page
The next step is to convince people that your lead magnet is
awesome, and they should give you their emails so that you send them the files.
To do so, you need the help of a lead capture page. The lead
capture page is basically a webpage whose content is to convince people to
enter their names and emails into a lead capture form.
Their names and emails go directly into your email list.
Also, they immediately receive a welcome email with the file download link.
Because you don’t try to sell anything, the lead capture
page doesn’t have to be complex to be effective. Just a simple webpage
explaining the benefits of the freebie will work.
Let’s create a sample lead capture page on Wix.
First step is to log into your Wix account, and create new
site. If you don’t have one, you can create one with the link here.

What kind of website do you
want to create?
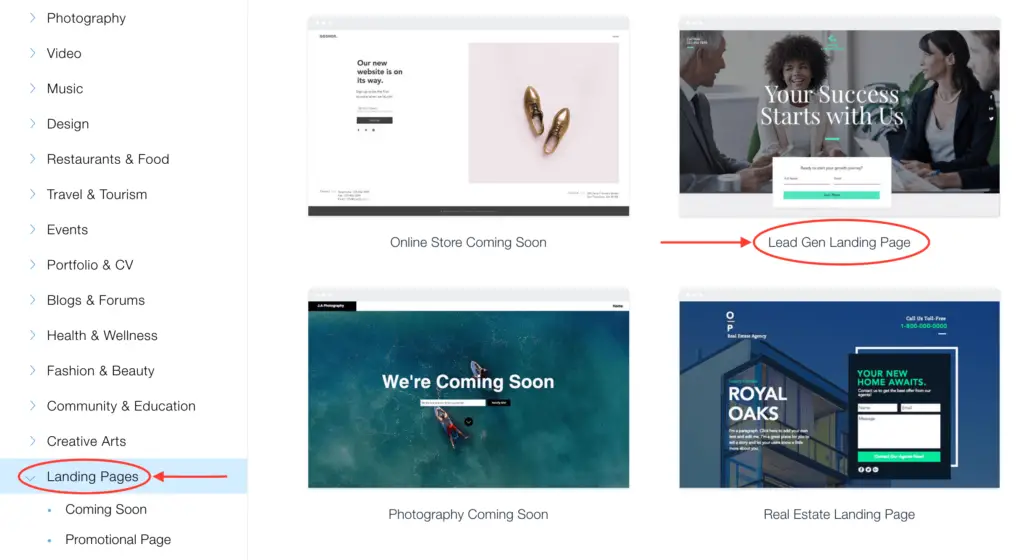
We are looking for a lead capture page or a landing page. But you won’t see it on the display list. Click “Other >”. I will show it to you in a few steps.

Choose how you want to
create your website
“Choose a Template” is your option. You have two options: Let Wix ADI Create a Website for You, or Create Your Website with the Wix Editor. But you have more freedom and flexibility when you use Wix Editor. That’s why I recommend that.

Pick the website template
you love
To create a website fast, you pick a template and customize
it to your liking. Wix has a large pool of template options for you to choose
from. I am going to use “Lead Gen Landing Page” template in “Landing Pages”
category for our lead capture page.
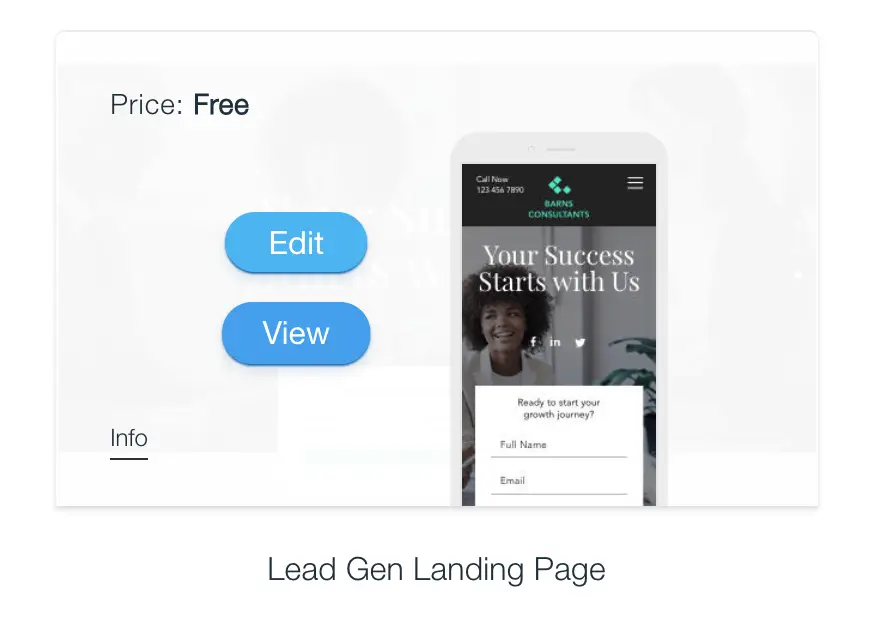
Then click the “Edit” button when you hover the mouse on the
template.
Wix Lead Capture Form
Wix redirects you to Wix Editor once you click on the “Edit”
button on the template. Here you have the freedom to change the website
elements like texts, pictures, colors to your liking. For now, let’s focus on
the most important element.
That element is the lead capture form where your visitors
enter their names and emails.
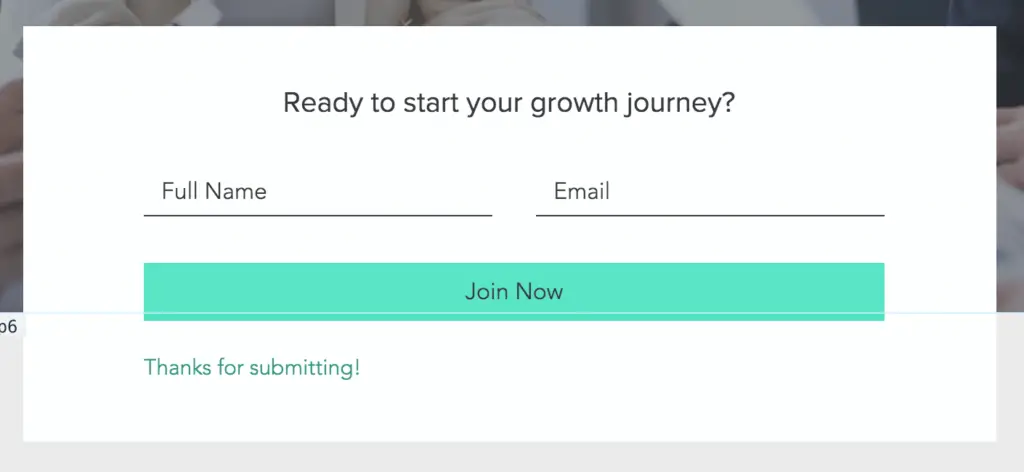
Your goal is to collect emails from your website visitors.
At the minimum the form must have an email input. The “Full Name” input is
optional, but preferable if you want your email to sound more personal.
The button label must be “Download” instead of “Join Now”.
Because your visitor wants to download the freebie.
Upload Your Lead Magnet
The file cannot be transferred directly from your computer
to your visitors’ computers. You first upload the file to your website. Then
your visitors download the file from your website.
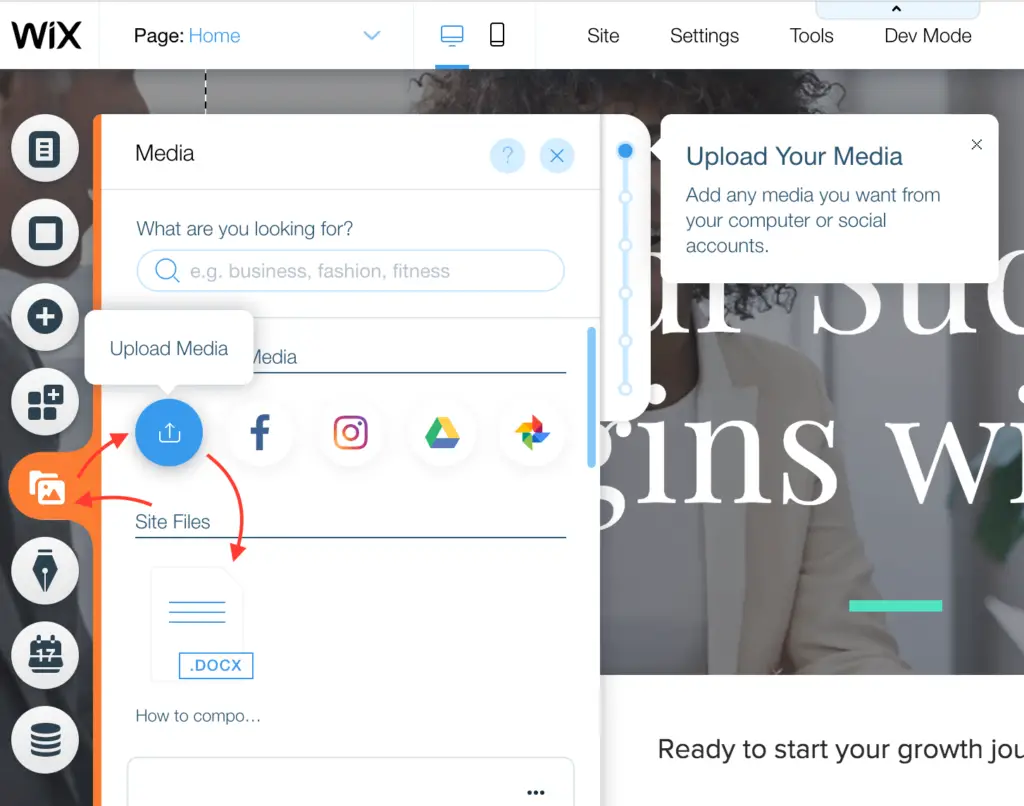
The following is how you upload your lead magnet in Wix.
Select “Media” icon, then click the blue “Upload Media”
button. Then you either drag & drop the file from your computer to the Box,
or click “Upload from Computer”. After uploading successfully, you see the file
under “Site Files”.
Step 3: Create Confirmation Email with the Download Link
Why don’t we allow the visitors to download the file directly by clicking on the lead capture form button? Is it more user-friendly?
I used to ask the same questions. And I did test out the
option. The result was not very positive. I got a lot of faked emails. Some
visitors downloaded the file without providing their emails.
The best way to enforce a valid email is to deliver the
download link in the confirmation email. The visitors must provide their emails
to receive the confirmation email from us. The visitors won’t get the link if
they don’t enter a valid email.
To create a confirmation email, you click on your lead
capture form on the screen. Select “Form Settings”. Click “Automation”. Then
click “Create” under “Send a thank you email”.
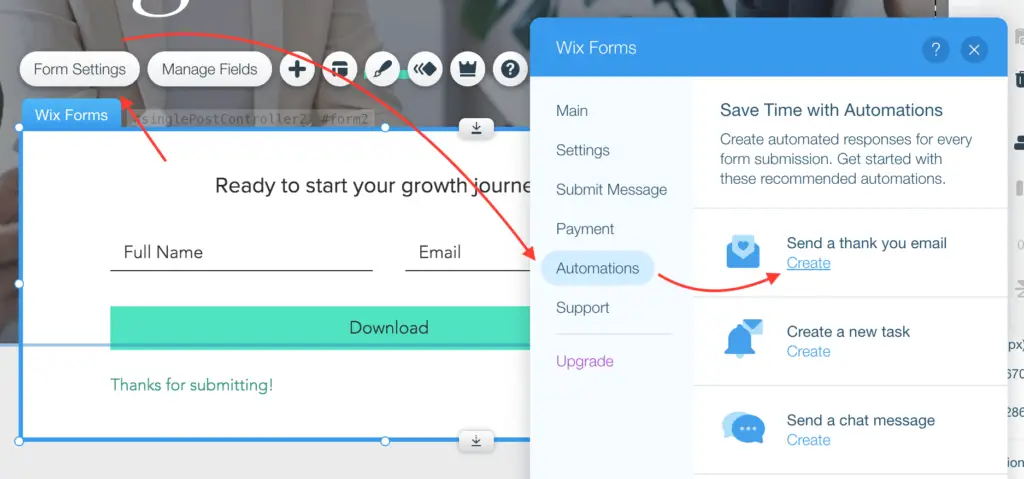
Now you are redirected to the “Automations” screen. You scroll down on the page until you see “Customize Your Sender Details”. Then hit “Edit” button.

Enter “From Name” and “Reply-to Email”. The “From Name” is
the name of your website. The “Reply-to Email” is the email address you want to
receive emails from your visitors. Done that? You hit “Save” button.
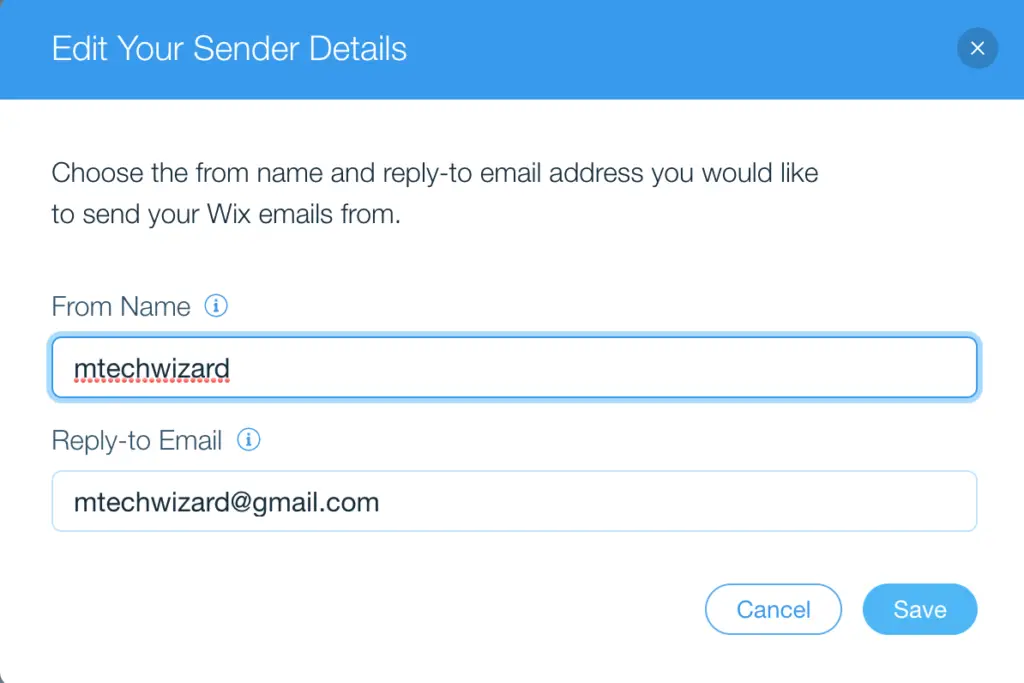
Wix then asks you for a code emailed to your “Reply-to Email”. This step is to verify that the email belongs to you. You open the email, copy & paste the code to Wix, and confirm.
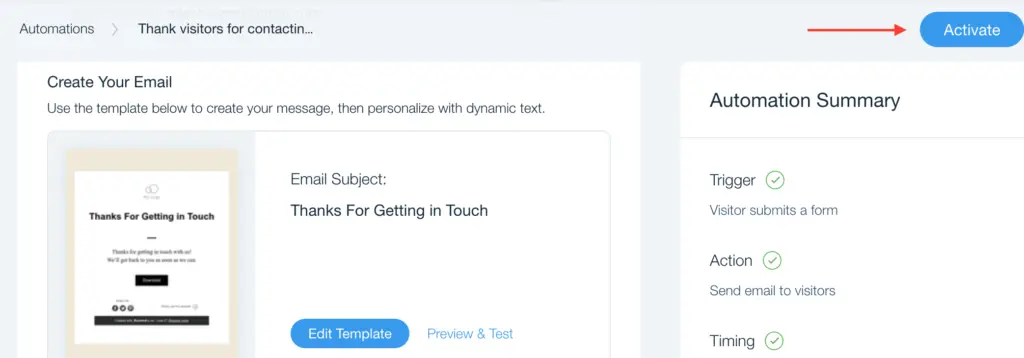
You scroll down to the “Create Your Email” section. Hit the
“Edit Template” button.
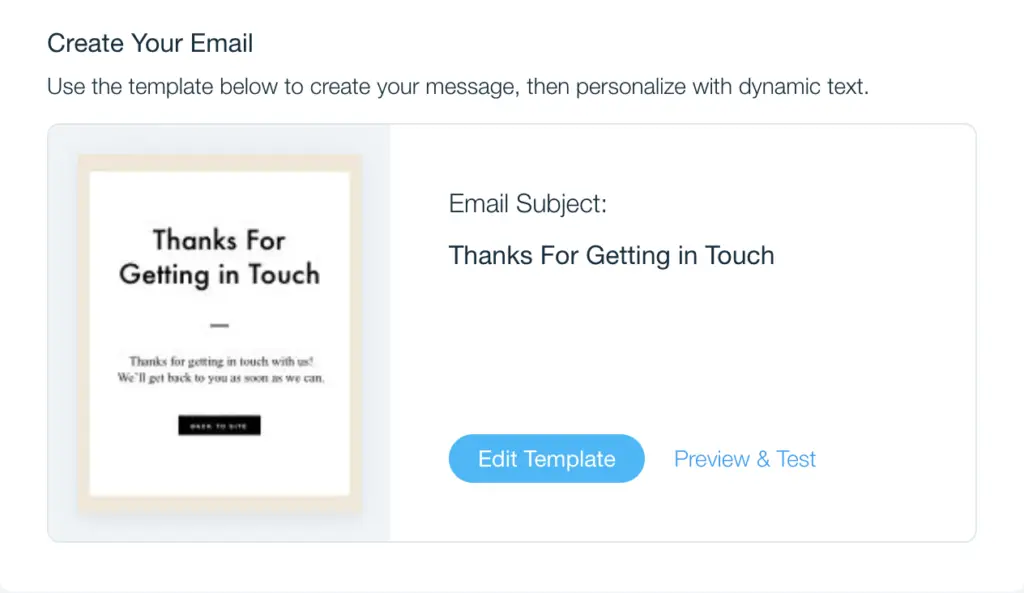
We want to change the button on the email from “Back to
Site” to “Download”. Then place the file download link on the button.
To do so, you select the button on the email. Change the
“Button Text” to Download. Then select “Link to Document”. Then hit “Choose
File”.
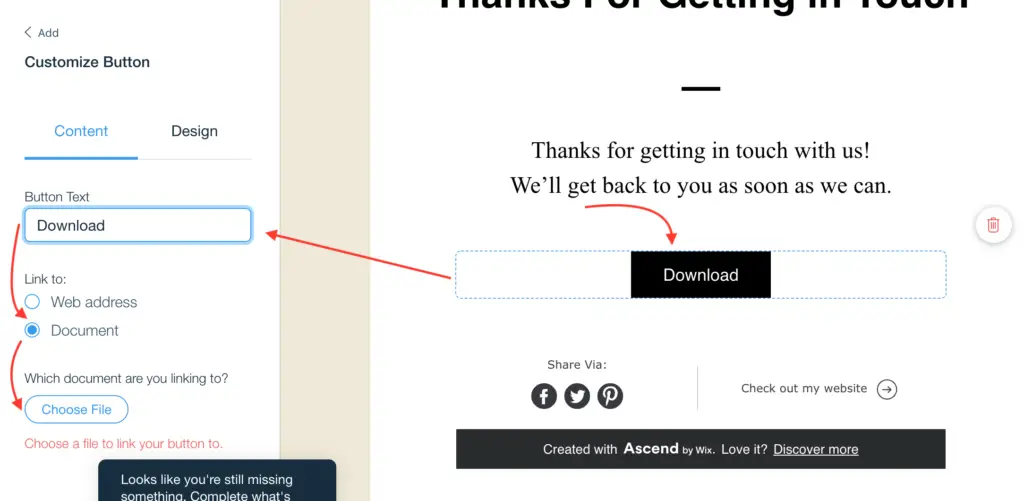
Then you select your lead magnet file and hit “Add to Page”.
Then hit “Apply”.
You may want to change the text of the email to match your blog niche. But, now you are done with the important steps to create a confirmation email with a download link. Hit “Save & Continue”. Then “Activate” the email automations.
Step 4: Test Your Lead Capture Process
Before you publish your site, it is a good idea to test the
functionality of the site. Let’s see our lead capture process in action.
You revisit the Wix site editor and hit the “Publish” button
at the upper right corner of the screen. Hit “View Site”.
Now on your live website, you enter your name and email to
the lead capture form, and hit “Download” button.
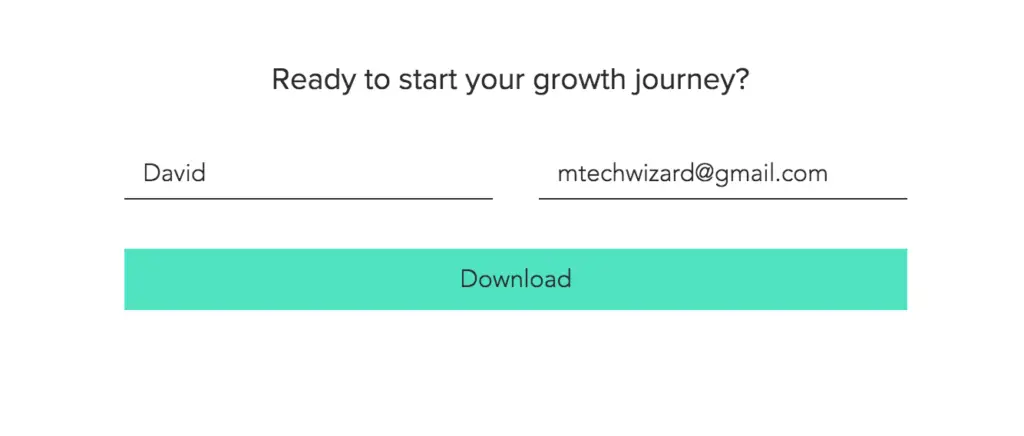
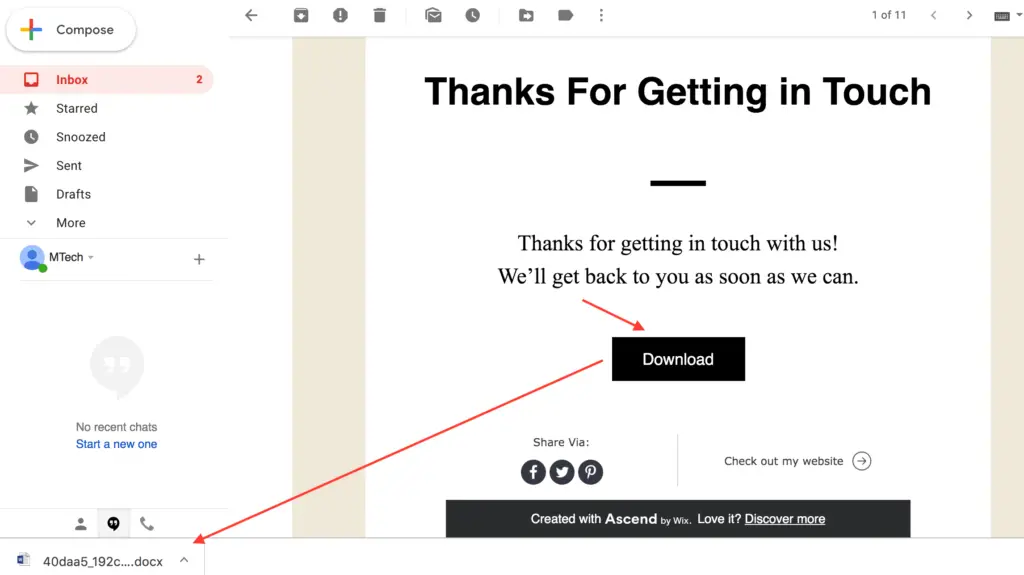
If your lead capture form works properly, you should get an email in your mailbox. Then hit the “Download” button in the email. The file should be auto-downloaded to your computer.

Step 5: Publish your landing page
If everything works, then congratulation! Now you know how to build an email list for Free with Wix. Don’t hesitate to create your own and start collecting emails.
If you have any question please leave a comment below, I
will help answer the question as quickly as possible.